Calendar Template
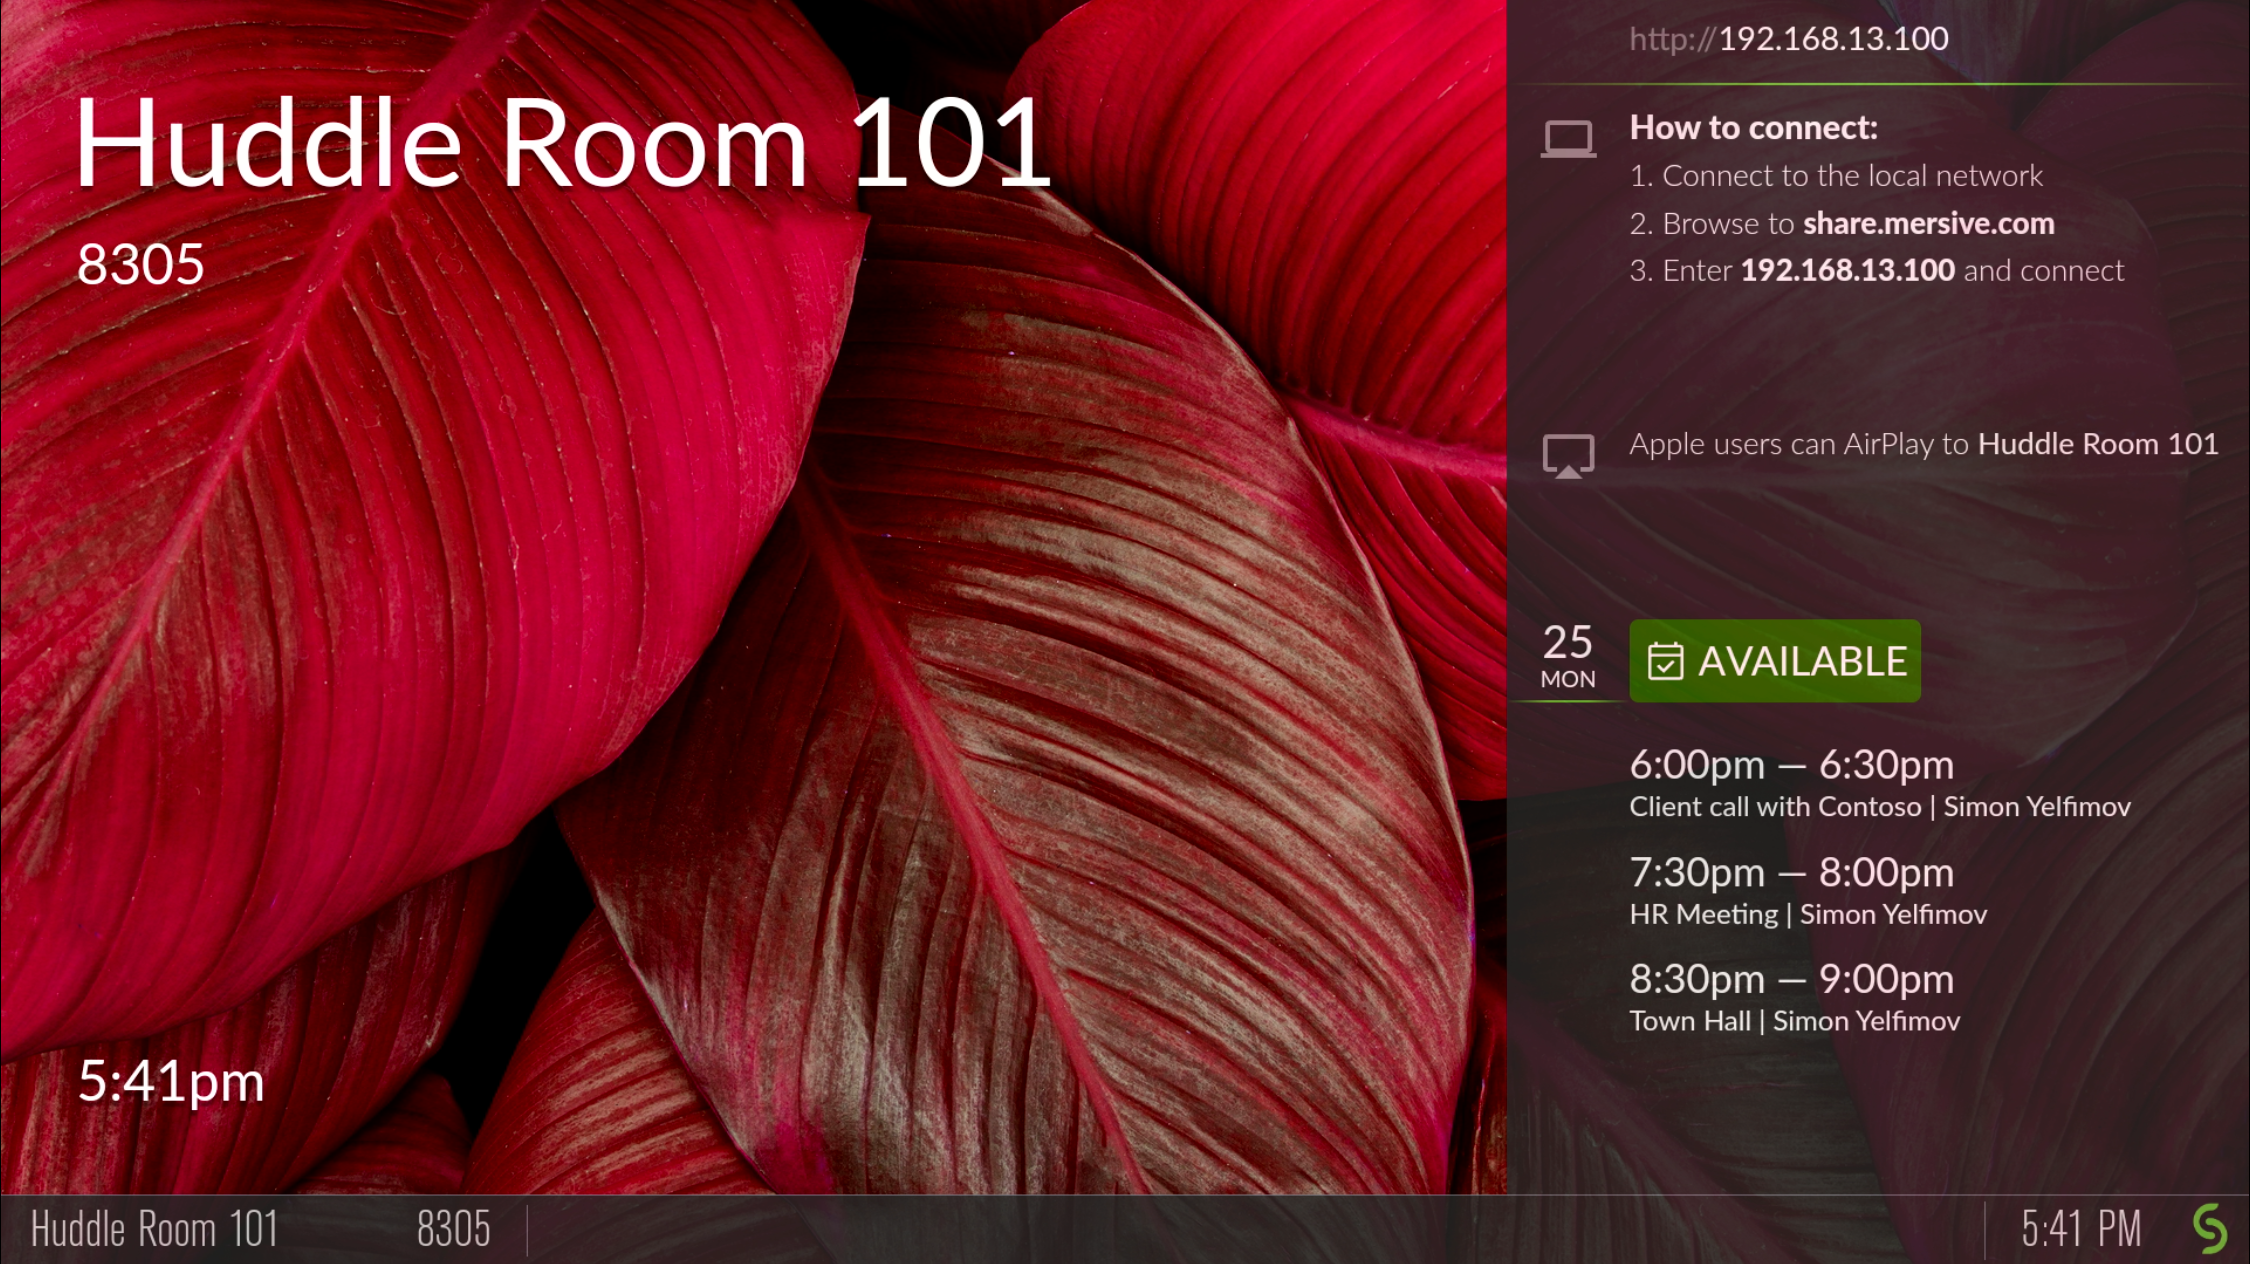
The Calendar template allows you to show the schedule and calendar information for the room when there is no other content being shared. Participants can see if the space is currently scheduled or available, as well as the next three upcoming meetings in the space.
How To
From the Solstice Cloud Home page, in the left sidebar navigation panel, click Manage > Templates > Calendar.
Click Create New Calendar Template.
Enter the Template Name. For example, name the template by location (London Office) or descriptively (Mountain Theme).
Click Save.
Tip
You can also start by duplicating an existing template and making changes to it. Click on the three dots on the right side of the template you want to start with, and choose Duplicate Template.
If you integrate a Microsoft Exchange account and do not supply an impersonation or delegation account, the personal calendar for that account is used.
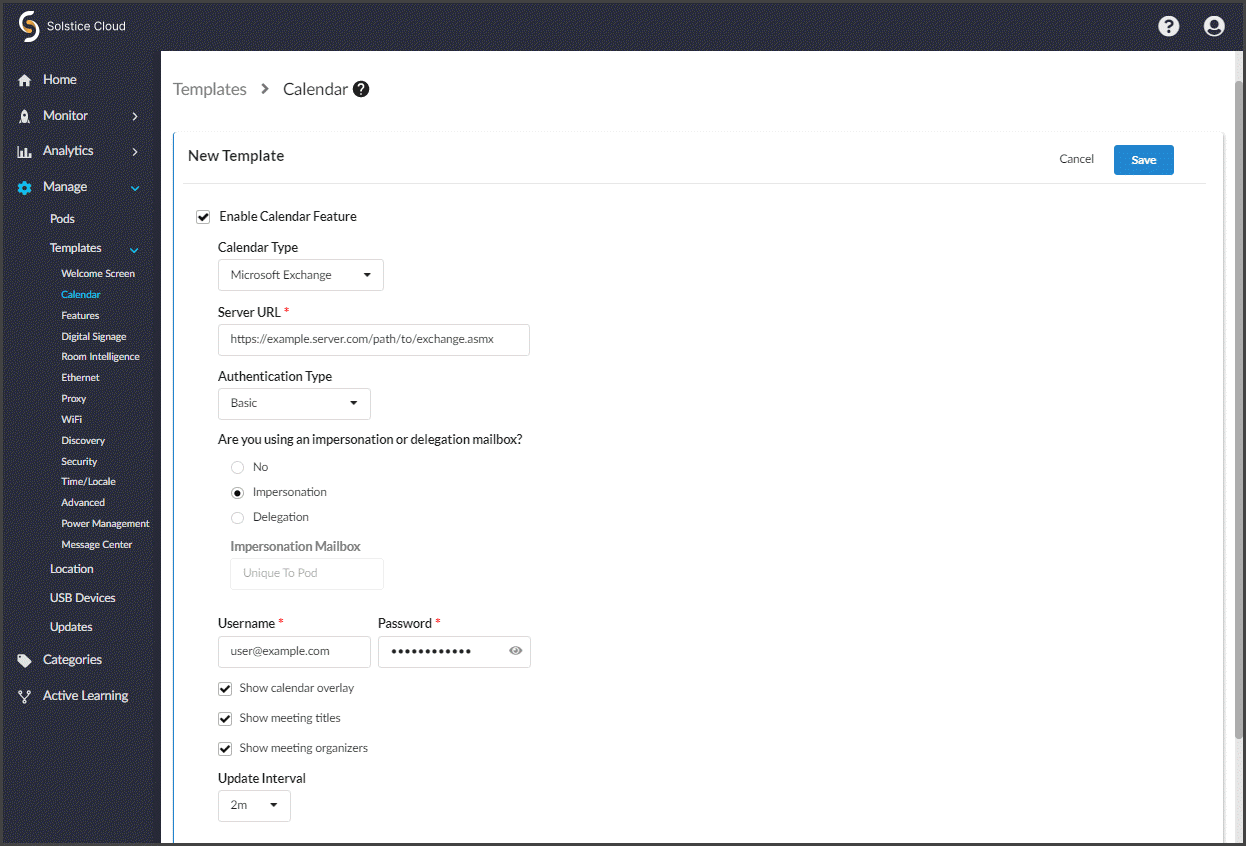
Select the Enable Calendar Feature checkbox.
From the Calendar Type list, select Microsoft Exchange.
In the Server URL field, enter the Microsoft Exchange server URL if that is the type of calendar you are integrating.
In the Authentication Type list, select the type of authentication your Microsoft Exchange server is using: Basic or NTLM.
Enter in the Username and Password for the room calendar account.
If you are a using an Impersonation or Delegation Mailbox, enter them into the corresponding fields.
By default, upcoming meetings on the integrated room calendar appear, including meeting title and organizer information, unless the meeting is marked as “private” in the organizer’s calendar. To hide meeting information, disable one or more of the following options:
Show calendar overlay - when checked, upcoming meeting information from the integrated room calendar is shown on the right overlay panel of the Solstice display.
Show meeting titles - when checked, the title of upcoming meetings scheduled on the integrated room calendar is shown in the calendar overlay.
Show meeting organizers - when checked, the organizer of upcoming meetings scheduled on the integrated room calendar is shown in the calendar overlay.
From the Update Interval list, select the frequency at which the Pod updates the calendar meeting information visible on the display.
Click Save.
Note
For Solstice 5.5 and earlier to auto-launch a scheduled video conference from the link in the body of a Microsoft 365 meeting invitation, the Microsoft Exchange server setting DeleteComments must be changed to $false for the room's Exchange or 365 mailbox account. When set to $true (default), the body of incoming meeting requests is removed, and the video conference cannot be auto-launched. For details on this Microsoft server setting, see the Microsoft documentation.
For more information about the additional Google Workspace configurations needed to integrate with Solstice, as well as how to obtain the necessary information for the fields below, see Google Workspace Settings for Integrating Resource Calendars with Solstice.
Select the Enable Calendar Feature checkbox.
From the Calendar Type list, select Google Calendar.
Click Upload service account credentials.
Navigate to the location of the service account file you created for the Pod and select it.
In the Room Email field, enter the Calendar ID email address from the Google Calendar settings.
By default, upcoming meetings on the integrated room calendar appear, including meeting title and organizer information, unless the meeting is marked as “private” in the organizer’s calendar. To hide meeting information, disable one or more of the following options:
Show calendar overlay - when checked, upcoming meeting information from the integrated room calendar is shown on the right overlay panel of the Solstice display.
Show meeting titles - when checked, the title of upcoming meetings scheduled on the integrated room calendar is shown in the calendar overlay.
Show meeting organizers - when checked, the organizer of upcoming meetings scheduled on the integrated room calendar is shown in the calendar overlay.
From the Update Interval list, select the frequency at which the Pod updates the calendar meeting information visible on the display.
Click Save.
If you integrate a Microsoft 365 account and do not supply an impersonation or delegation account, the personal calendar for that account is used.
For more information about the additional 365 configurations needed to integrate with Solstice, as well as how to obtain the necessary information for the fields below, see Updating Your Organization's Microsoft 365 Calendar Configurations.
Important
Mersive strongly recommends using Microsoft's Modern (OAuth2) authentication type, as Microsoft began disabling its Basic authentication in 2021.
Select the Enable Calendar Feature checkbox.
From the Calendar Type list, select Microsoft 365 Online.
In the Authentication Type list, select OAUTH2.
In the Tenant ID field, enter the Tenant ID.
In the Client ID field, enter your Client ID.
In the Client Secret field, enter the Client Secret.
By default, upcoming meetings on the integrated room calendar is displayed, including meeting title and organizer information, unless the meeting is marked as “private” in the organizer’s calendar. To hide meeting information, disable one or more of the following options:
Show calendar overlay - when checked, upcoming meeting information from the integrated room calendar is shown on the right overlay panel of the Solstice display.
Show meeting titles - when checked, the title of upcoming meetings scheduled on the integrated room calendar is shown in the calendar overlay.
Show meeting organizers - when checked, the organizer of upcoming meetings scheduled on the integrated room calendar is shown in the calendar overlay.
From the Update Interval list, select the frequency at which the Pod updates the calendar meeting information visible on the display.
Click Save. A message displays confirming that the Pod configuration is updated.
Note
For Solstice 5.5 and earlier to auto-launch a scheduled video conference from the link in the body of a Microsoft 365 meeting invitation, the Microsoft Exchange server setting DeleteComments must be changed to $false for the room's Exchange or 365 mailbox account. When set to $true (default), the body of incoming meeting requests is removed, and the video conference cannot be auto-launched. For details on this Microsoft server setting, see the Microsoft documentation.
Warning
Using this option to integrate a third-party calendar requires advanced configurations using our OpenControl API.
Select the Enable Calendar Feature checkbox.
From the Calendar Type list, select 3rd Party Only.
By default, upcoming meetings on the integrated room calendar appear, including meeting title and organizer information, unless the meeting is marked as “private” in the organizer’s calendar. To hide meeting information, disable one or more of the following options:
Show calendar overlay - when checked, upcoming meeting information from the integrated room calendar is shown on the right overlay panel of the Solstice display.
Show meeting titles - when checked, the title of upcoming meetings scheduled on the integrated room calendar is shown in the calendar overlay.
Show meeting organizers - when checked, the organizer of upcoming meetings scheduled on the integrated room calendar is shown in the calendar overlay.
From the Update Interval lit, select the frequency at which the Pod updates the calendar meeting information visible on the display.
Click Save.
Note
Solstice administrators should be aware that the Cloud settings for a Solstice Pod take precedence and overwrite any conflicting settings on the Pod itself.
In the case of a settings mismatch for a Pod between Solstice Cloud and the Pod's own settings, Cloud settings always "win." The only exception is when a settings change in a Cloud template causes Solstice Cloud to be unable to connect to the Pod. In this case, the settings in that template set are rolled back to the last working configuration for that Pod. Pod and template status indicators alert users when this case occurs.
In the left sidebar menu of Solstice Cloud, click Manage > Pods.
The Pod Template Assignments table displays. This table is used to apply templates across your deployment. You can apply a template to multiple Pods at once.
Tip
Filter Solstice Pods in your deployment by default categories or categories you have created to apply templates efficiently to similar Pods. Filters allow you to apply templates by criteria such as location or campus, depending on the categories you have created and assigned to Pods.
Select the Pods you want to apply the template to. You can select each Pod's checkbox individually, or select the checkbox in the header row of the table to select all Pods showing in the table.
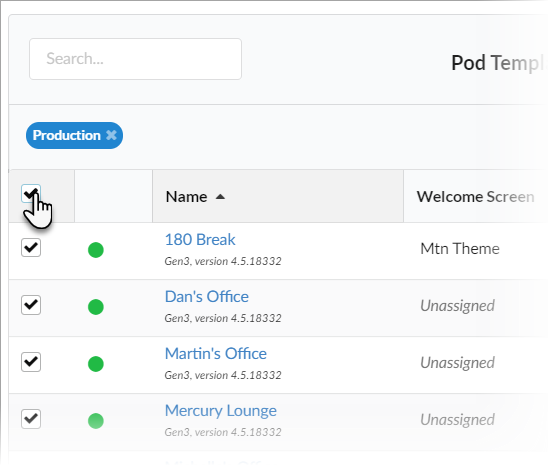
For each template you want to apply, go to the corresponding template type column (e.g., Welcome Screen). You can view different groups of templates by selecting a template category in the upper right corner of the table.

Select the template with the desired configuration from the list in the appropriate column for one of the selected Pods. This applies the template to all the selected Pods in the table.
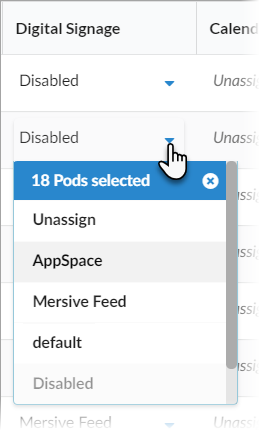
Click Confirm when to confirm applying the selected template to all selected Pods.
As changes are being applied, the pending changes
 icon appears next to the template(s) being applied. After the changes are applied, the Pod's normal status resumes.
If a Pod is offline, any changes made are applied when the Pod comes back online.
If a settings change in a Cloud template causes Solstice Cloud to be unable to connect to the Pod, the Pod's settings for that template is rolled back to their previous configuration. A failure icon
 shows that the template could not be applied.
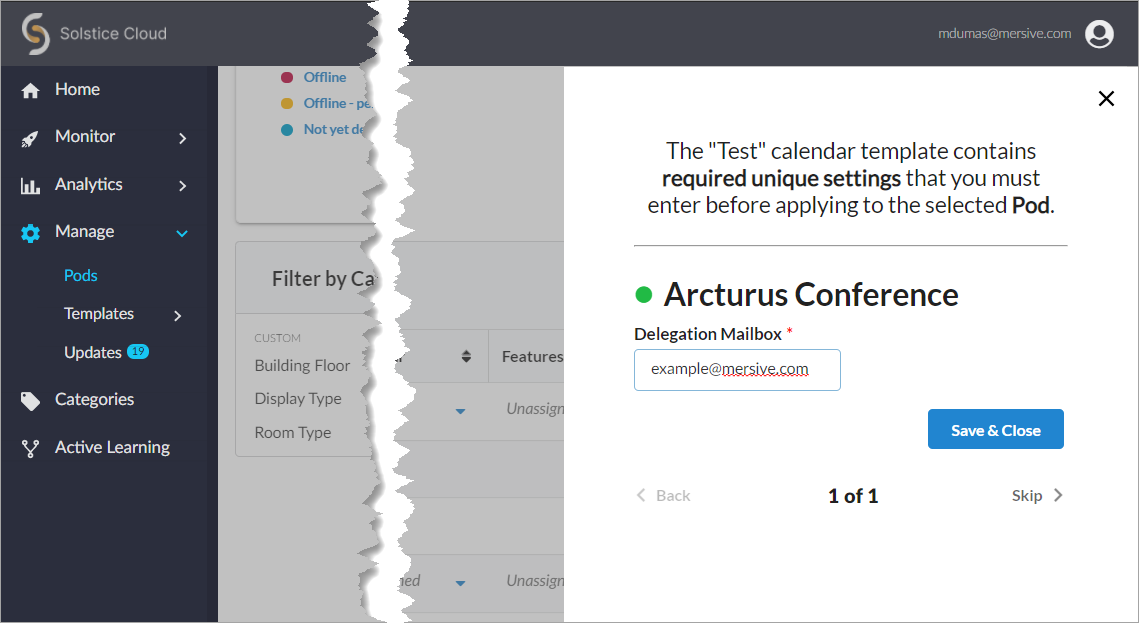
If a template you applied has any unique-to-Pod settings that need to be applied each Pod individually, a pop-up pane appears prompting you to enter the needed information for each affected Pod. After you complete all of the settings screens, click Save & Close.
Tip
Solstice checks the settings selected for a Pod in Solstice Cloud management against the settings on the Pod itself approximately once an hour, as well as upon Pod reboot.
