Proxy Template
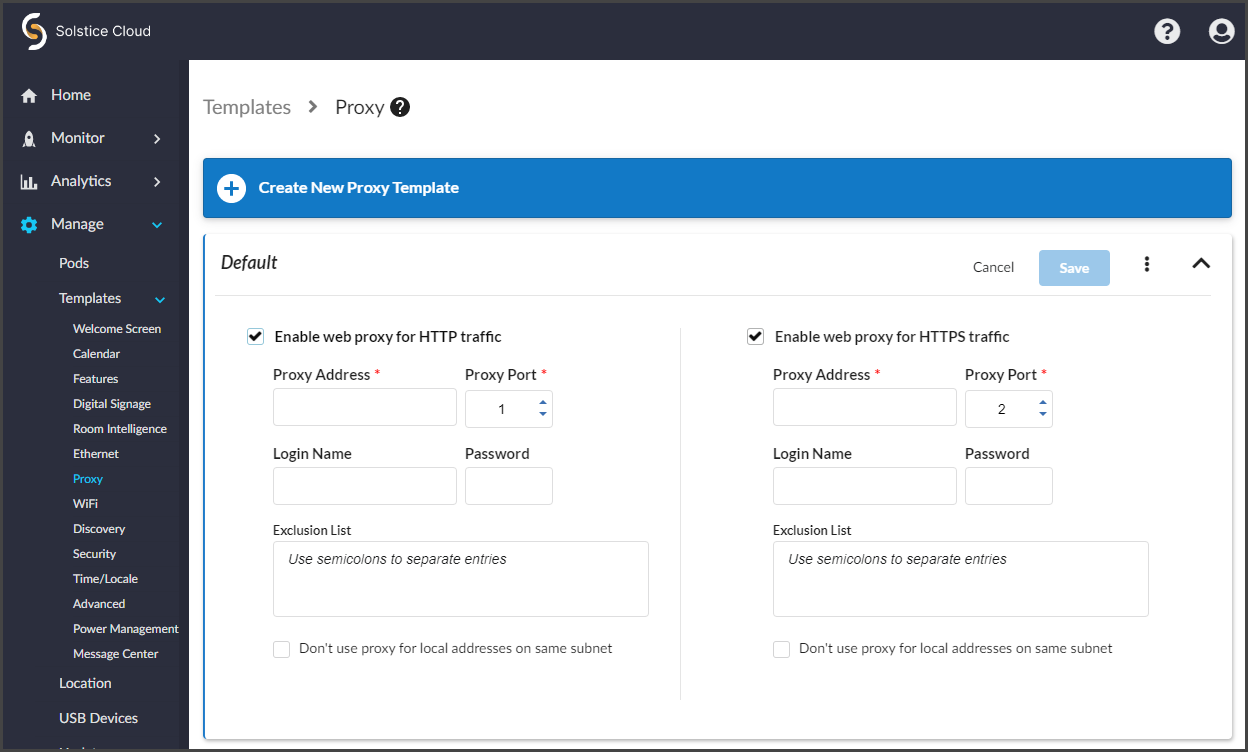
The Proxy template provides a method to configure Solstice displays deployed behind a secure web proxy to reach the licensing and over-the-air (OTA) update servers. Options to enable the web proxy for both http and https traffic are available.

How To
From the Solstice Cloud Home page, in the left sidebar navigation panel, click Manage > Templates > Proxy.
Click Create New Proxy Template.
Enter the Template Name. For example, you could name the template by location (London Office) or descriptively (Mountain Theme).
Click Save.
Tip
You can also start by duplicating an existing template and making changes to it. Click on the three dots on the right side of the template you want to start with, and choose Duplicate Template.
Select the Enable web proxy for HTTP or HTTPS traffic checkbox.
In the Proxy IP Address field, enter the proxy server IP address.
In the Proxy Port field, enter in the network port required to connect with your proxy server.
In the Login Name and Password fields, enter in login credentials for your proxy server.
To manually configure an exclusion list for the proxy server, enter in the IP addresses to bypass the proxy server into the Exclusion List field. Multiple IP addresses can be added using semi-colons to separate the entries.
If you need addresses on the same subnet as the Pod to bypass the proxy server, select the Don't use proxy for local addresses on same subnet checkbox.
Note
Solstice administrators should be aware that the Cloud settings for a Solstice Pod take precedence and overwrite any conflicting settings on the Pod itself.
In the case of a settings mismatch for a Pod between Solstice Cloud and the Pod's own settings, Cloud settings always "win." The only exception is when a settings change in a Cloud template causes Solstice Cloud to be unable to connect to the Pod. In this case, the settings in that template set are rolled back to the last working configuration for that Pod. Pod and template status indicators alert users when this case occurs.
In the left sidebar menu of Solstice Cloud, click Manage > Pods.
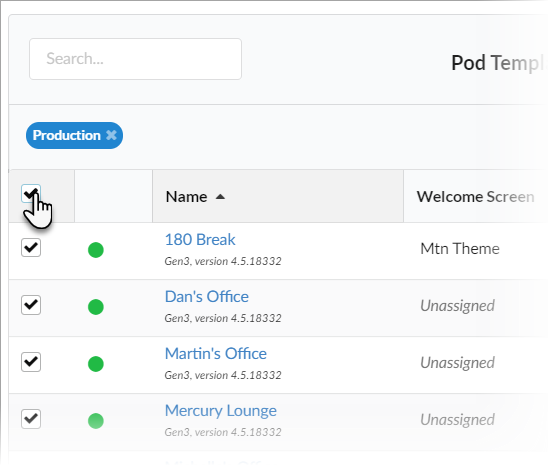
The Pod Template Assignments table displays. This table is used to apply templates across your deployment. You can apply a template to multiple Pods at once.
Tip
Filter Solstice Pods in your deployment by default categories or categories you have created to apply templates efficiently to similar Pods. Filters allow you to apply templates by criteria such as location or campus, depending on the categories you have created and assigned to Pods.
Select the Pods you want to apply the template to. You can select each Pod's checkbox individually, or select the checkbox in the header row of the table to select all Pods showing in the table.

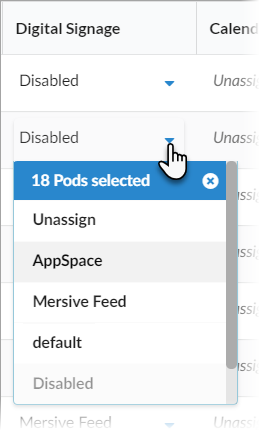
For each template you want to apply, go to the corresponding template type column (e.g., Welcome Screen). You can view different groups of templates by selecting a template category in the upper right corner of the table.

Select the template with the desired configuration from the list in the appropriate column for one of the selected Pods. This applies the template to all the selected Pods in the table.

Click Confirm when to confirm applying the selected template to all selected Pods.
As changes are being applied, the pending changes
 icon appears next to the template(s) being applied. After the changes are applied, the Pod's normal status resumes.
If a Pod is offline, any changes made are applied when the Pod comes back online.
If a settings change in a Cloud template causes Solstice Cloud to be unable to connect to the Pod, the Pod's settings for that template is rolled back to their previous configuration. A failure icon
 shows that the template could not be applied.
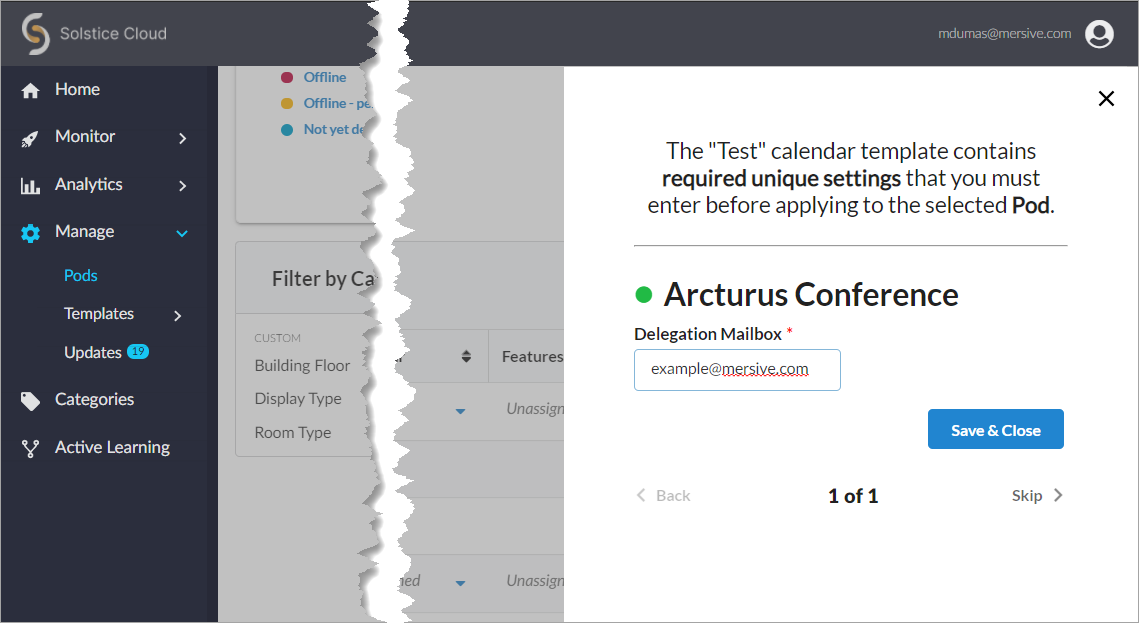
If a template you applied has any unique-to-Pod settings that need to be applied each Pod individually, a pop-up pane appears prompting you to enter the needed information for each affected Pod. After you complete all of the settings screens, click Save & Close.

Tip
Solstice checks the settings selected for a Pod in Solstice Cloud management against the settings on the Pod itself approximately once an hour, as well as upon Pod reboot.