Welcome Screen Template
The Welcome Screen template gives you many options to customize the appearance of your Solstice display welcome screen to match your organization's branding by changing or uploading background images, adding custom connection instructions, choosing the text color, and more.
How To
From the Solstice Cloud Home page, in the left sidebar navigation panel, click Manage > Templates > Welcome Screen.
Click Create New Welcome Screen Template.
Enter the template name. For example, you could name the template by location (London Office) or descriptively (Mountain Theme).
After you are done creating and customizing your template, click Save in the top right corner of the template. After a template is saved, it can be assigned to Pods. Templates can be edited or deleted at any time.
Tip
You can also start by duplicating an existing template and making changes to it. Click on the three dots on the right side of the template you want to start with, and choose Duplicate Template.
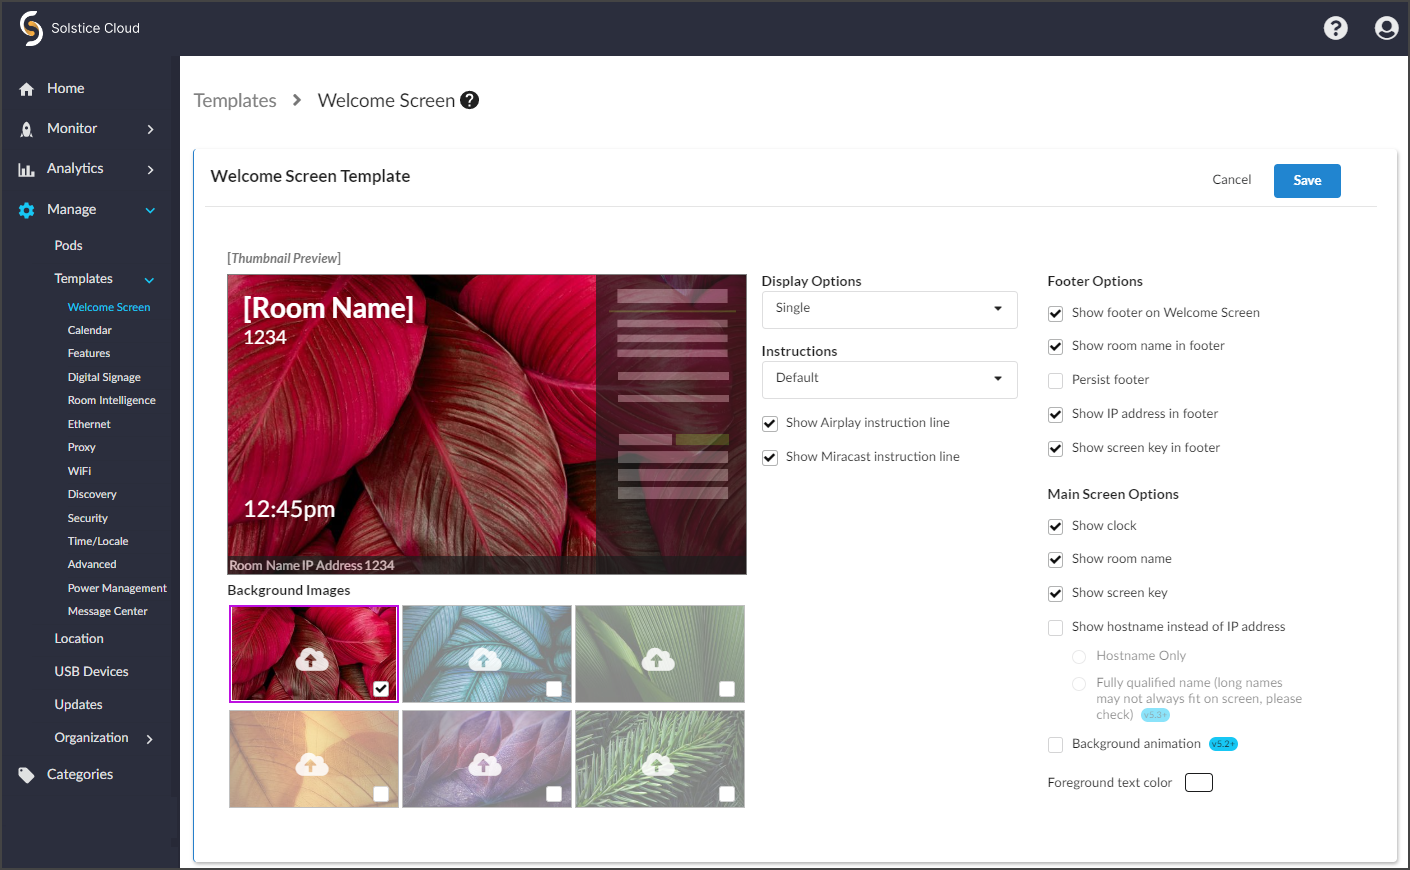
The Thumbnail Preview displays how the Solstice welcome screen looks with the current settings. This preview changes as you edit options on the page. Below the preview, you can manage the Background Images. You can have up to six background images, and the welcome screen rotates through the images that are enabled.
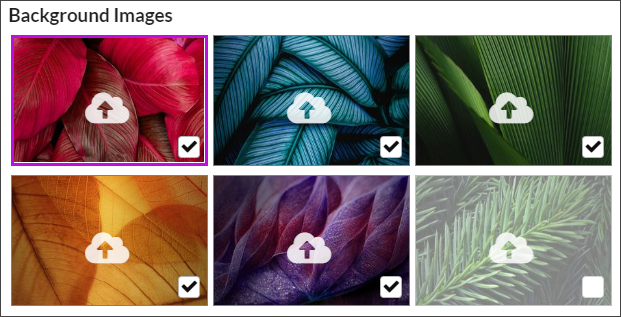
To change the background image to one of your own, click on the upload icon for that background image. Then browse to the image file and select.
Disable background images from the rotating display by deselecting the checkbox in the lower right corner of the background image preview.
Click Save.
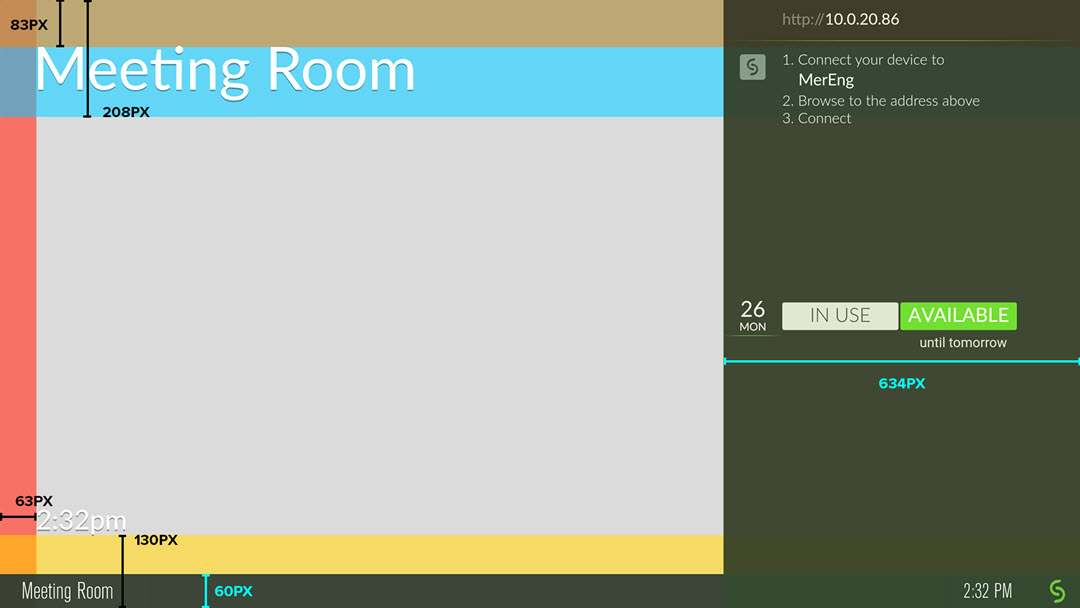
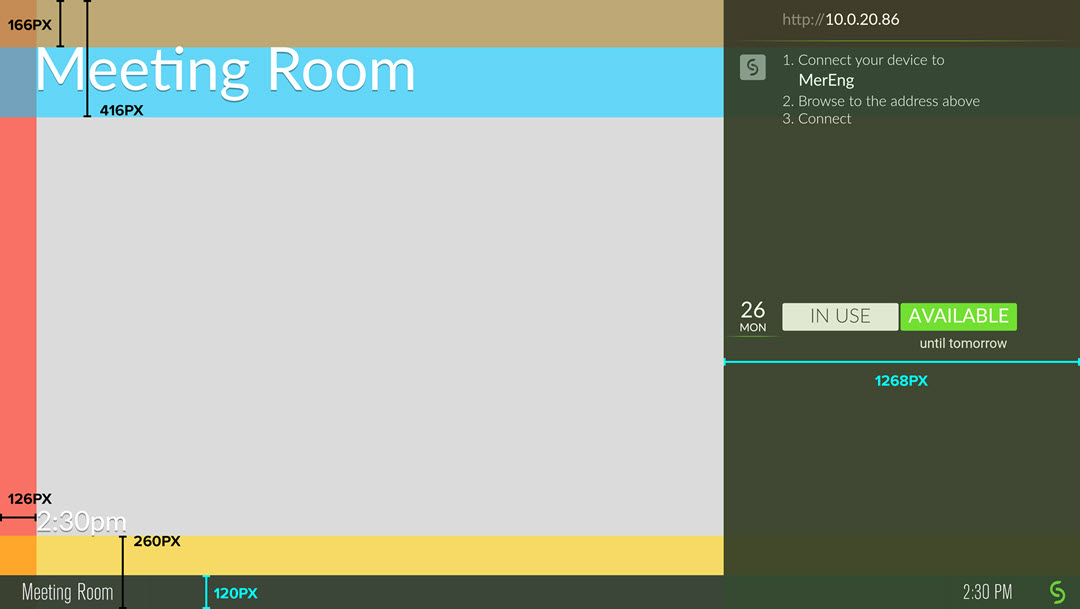
The Solstice screen measures 1920x1080 pixels at 1080p and 3840x2160 at 4K. Refer to the pixel maps if you are using the Solstice footer and/or sidebar overlay to ensure Solstice elements do not overlap important aspects of custom background images (.png or .jpg) or digital signage. See Solstice screen pixel maps.
Check out How to Customize the Solstice Welcome ScreenHow to Customize the Solstice Welcome Screen for more ways to update information and display options on the Solstice Pod's welcome screen.
If you are using two monitors, you can control how the screens are displayed. Display options are available for Pods that are connected to a single display monitor, or dual (two) display monitors.
From the Display Options list, select how you want Pods assigned to this template to appear on connected monitors based on your preferences and Pods' display configuration:
Single (default): Select this setting for Pods connected to a single display monitor.
Dual - Mirror: Select to have Pods display the same (mirror) content on two connected display monitors.
Dual - Extend: Select to have Pods treat two connected displays as a single collaboration panel. Content can be shared to both displays and moved between them. Solstice intelligently knows where one display ends and the next begins and does not break a content post across the two displays.
Dual - Seamless Extend: Select to have content posted across two displays as if they are a single seamless display. This mode is recommended for video walls or other setups where there is no bevel or seam between the two displays.
Note
Extend and Seamless Extend modes for Solstice Pods with dual display monitors do not currently affect the Solstice welcome screen, causing the Solstice welcome screen to always appears mirrored on both monitors. However, Extend and Seamless Extend settings do still apply to the Solstice sharing space, allowing shared content posts to be spread out and moved around across both monitors. (KBE-1016)
An issue on newer Gen3 Solstice Pods that made sharing appear in Dual - Mirror mode rather than Dual - Extend or Dual - Seamless Extend mode has been resolved in Solstice 6.1.2. (BUG-6448)
Click Save.
Note
Dual output display options are only available for Gen3 Pods with dual HDMI out.
Connection instructions give end-users the information they need to connect to Solstice. You can customize these instructions according to how your organization has configured Solstice to allow users to quickly connect.
From the Instructions list, select how you want the connection instructions to appear on the welcome screen for meeting participants.
Default: Selecting this setting displays Solstice's default connection instructions to meeting attendees on the welcome screen.
Show custom instructions: Allows the creation of custom connection instructions specific to your organization's Solstice configuration.
When Show custom instructions is selected, a rich text field appears below, allowing you to enter and format custom connection instructions.
Tip
You can include responsive variables, which will be automatically replaced with Pod-specific information, in your custom instructions. Available variables are
[RoomName],[ScreenKey],[WifiNetworkName],[WifiIP],[EthNetworkName], and[EthIP]. Note that variables are case sensitive.You can use the following as a starting point for your custom instructions:
To get started:
1. Browse to share.mersive.com
2. Enter [EthIP] or [WifiIP]
3. Enter the Screen Key [ScreenKey] and connect
4. Share content to this screen!
To hide Airplay instructions, uncheck Show Airplay instruction line.
To hide the Miracast instructions, uncheck Show Miracast instruction line.
Click Save. A message displays confirming that the Pod configuration are updated.
The footer at the bottom the Solstice welcome screen shows information for users to easily discover and connect to that Solstice Pod's display. Solstice allows you to set whether or not this presence bar shows, as well as the information it contains.
Select the following options as appropriate to your Solstice configuration and preferences:
Show footer on Welcome Screen: Displays the presence bar as a footer on the welcome screen.
Show room name in footer: Displays the room/display name.
Persist footer: Footer always displays, even during collaboration sessions.
Show IP address in footer: Displays the Pod's IP address or DNS hostname.
Show screen key in footer: If a screen key is enabled on a Pod, this option displays the 4-digit screen key required to connect to the Pod.
Click Save.
These options control elements that display on the Solstice welcome screen, such as the clock or the room name.
Watch the thumbnail preview to see how the footer changes as you select or deselect the following options:
Show clock
Show room name
Show screen key (if screen key is enabled)
Select Show hostname instead of IP address to show the hostname of the Pod rather than its IP address on the welcome screen. (No preview available.)
Choose Hostname Only to show only the name of the individual Pod.
Choose the Fully qualified name option to show the Pod's fully qualified domain name.
Select Background animation to enable a slow-moving pan back and forth on the selected background image(s) to mitigate potential display burn-in (particularly useful when using only one background image).
To change the color of the text on the welcome screen, find the Foreground text color option under the Main Screen Options and click on the color preview box (white by default). You can either select a color using the color picker or enter the 6-digit hex code of the color to use.
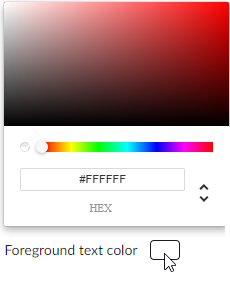
Click Save.
Note
Solstice administrators should be aware that the Cloud settings for a Solstice Pod take precedence and overwrite any conflicting settings on the Pod itself.
In the case of a settings mismatch for a Pod between Solstice Cloud and the Pod's own settings, Cloud settings always "win." The only exception is when a settings change in a Cloud template causes Solstice Cloud to be unable to connect to the Pod. In this case, the settings in that template set are rolled back to the last working configuration for that Pod. Pod and template status indicators alert users when this case occurs.
In the left sidebar menu of Solstice Cloud, click Manage > Pods.
The Pod Template Assignments table displays. This table is used to apply templates across your deployment. You can apply a template to multiple Pods at once.
Tip
Filter Solstice Pods in your deployment by default categories or categories you have created to apply templates efficiently to similar Pods. Filters allow you to apply templates by criteria such as location or campus, depending on the categories you have created and assigned to Pods.
Select the Pods you want to apply the template to. You can select each Pod's checkbox individually, or select the checkbox in the header row of the table to select all Pods showing in the table.
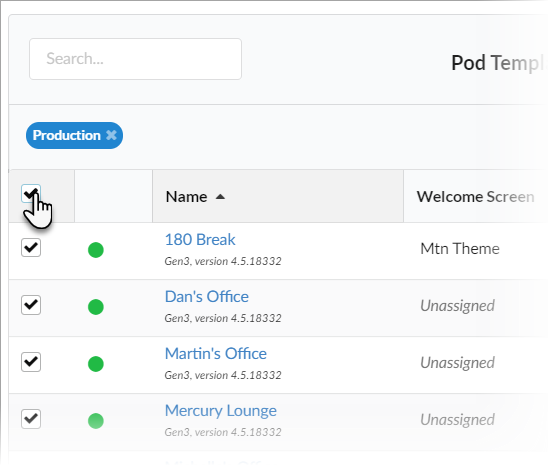
For each template you want to apply, go to the corresponding template type column (e.g., Welcome Screen). You can view different groups of templates by selecting a template category in the upper right corner of the table.

Select the template with the desired configuration from the list in the appropriate column for one of the selected Pods. This applies the template to all the selected Pods in the table.
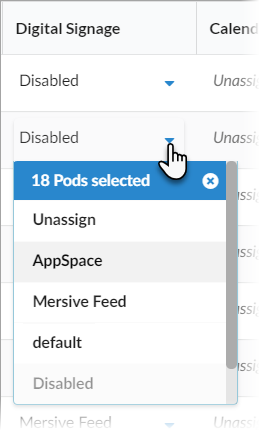
Click Confirm when to confirm applying the selected template to all selected Pods.
As changes are being applied, the pending changes
 icon appears next to the template(s) being applied. After the changes are applied, the Pod's normal status resumes.
If a Pod is offline, any changes made are applied when the Pod comes back online.
If a settings change in a Cloud template causes Solstice Cloud to be unable to connect to the Pod, the Pod's settings for that template is rolled back to their previous configuration. A failure icon
 shows that the template could not be applied.
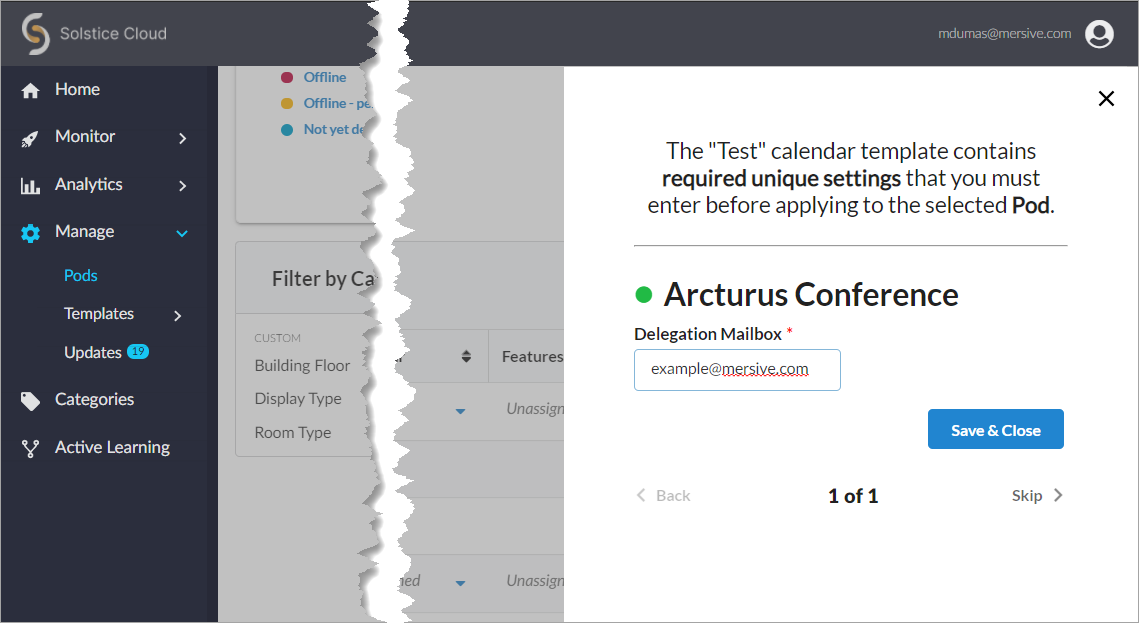
If a template you applied has any unique-to-Pod settings that need to be applied each Pod individually, a pop-up pane appears prompting you to enter the needed information for each affected Pod. After you complete all of the settings screens, click Save & Close.
Tip
Solstice checks the settings selected for a Pod in Solstice Cloud management against the settings on the Pod itself approximately once an hour, as well as upon Pod reboot.
