Organizations
Organization Management is a feature of the admin portal that lets you organize your devices into groups. For small scale deployments of less than 10 devices, one organization might be enough. But for large scale deployments, having multiple organizations gives you the flexibility to manage your devices in a way that best fits with your group’s organizational structure, such as:
English department, Business department, Math department, etc.
Building 1, Building 2, Building 3, etc.
Cost Code 100, Cost Code 110, Cost Code 120, etc.
1st Floor, 2nd Floor, Lobby, etc.
Users can be in multiple organizations, but a device can be in one organization only. If you have multiple organizations, you will need to switch between them to see all the devices associated with your account. If you need to move a device between organizations, contact Mersive customer support.
How to Create an Organization
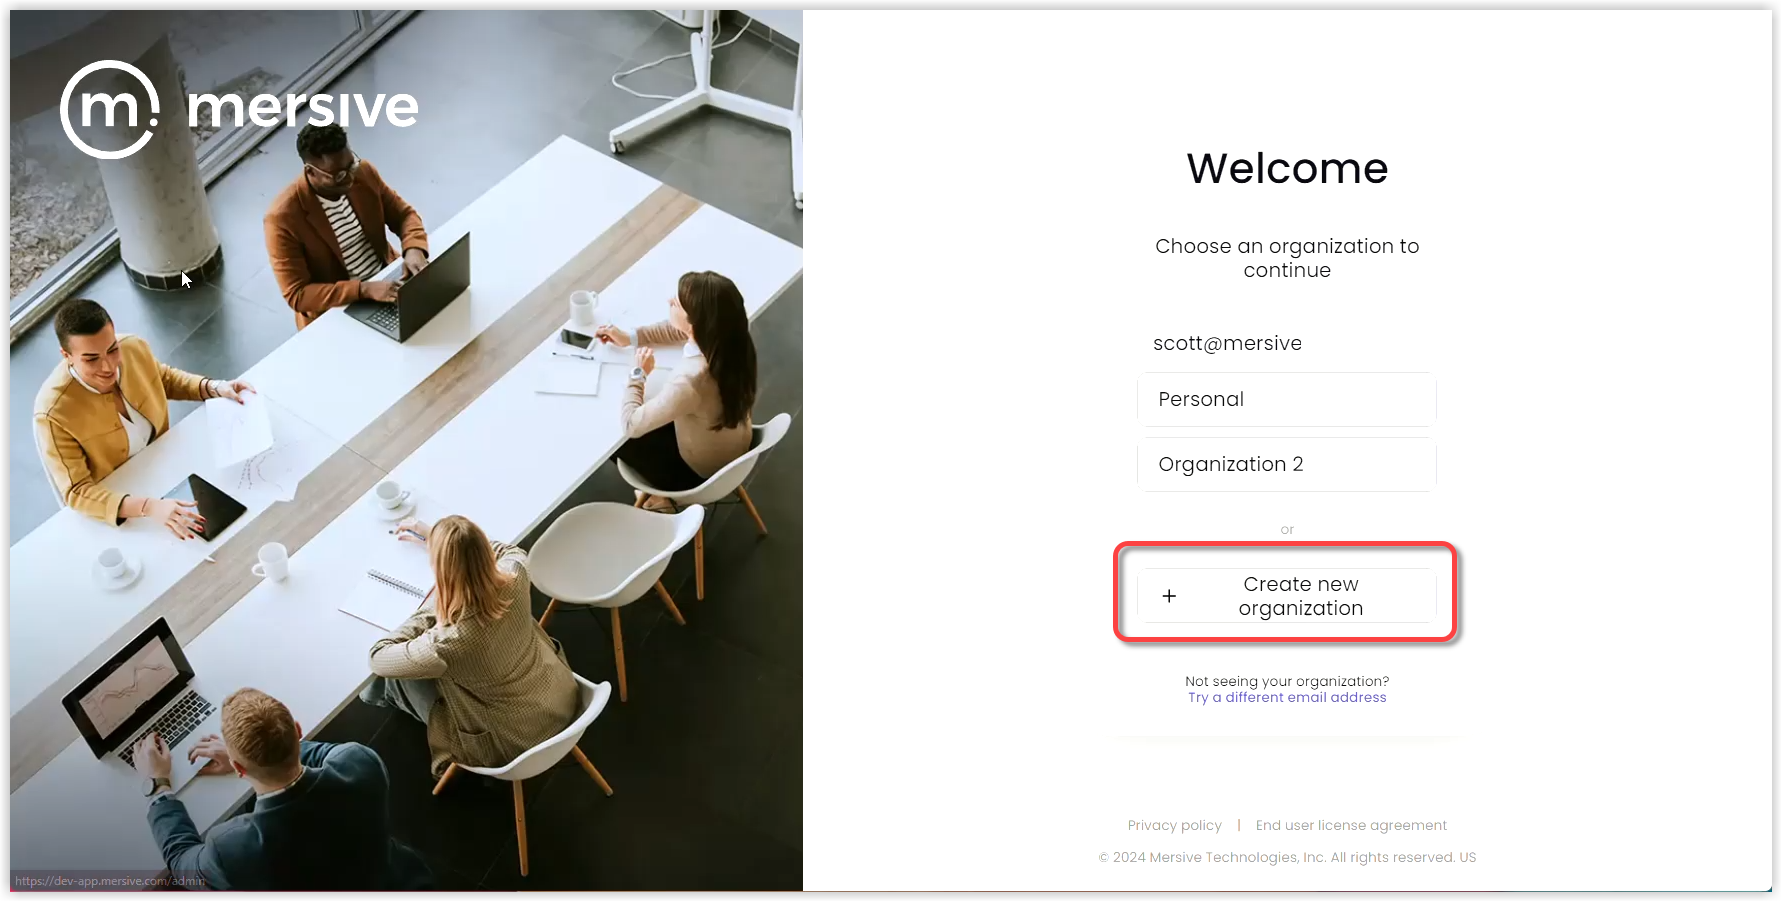
To create a new organization, take the following steps:
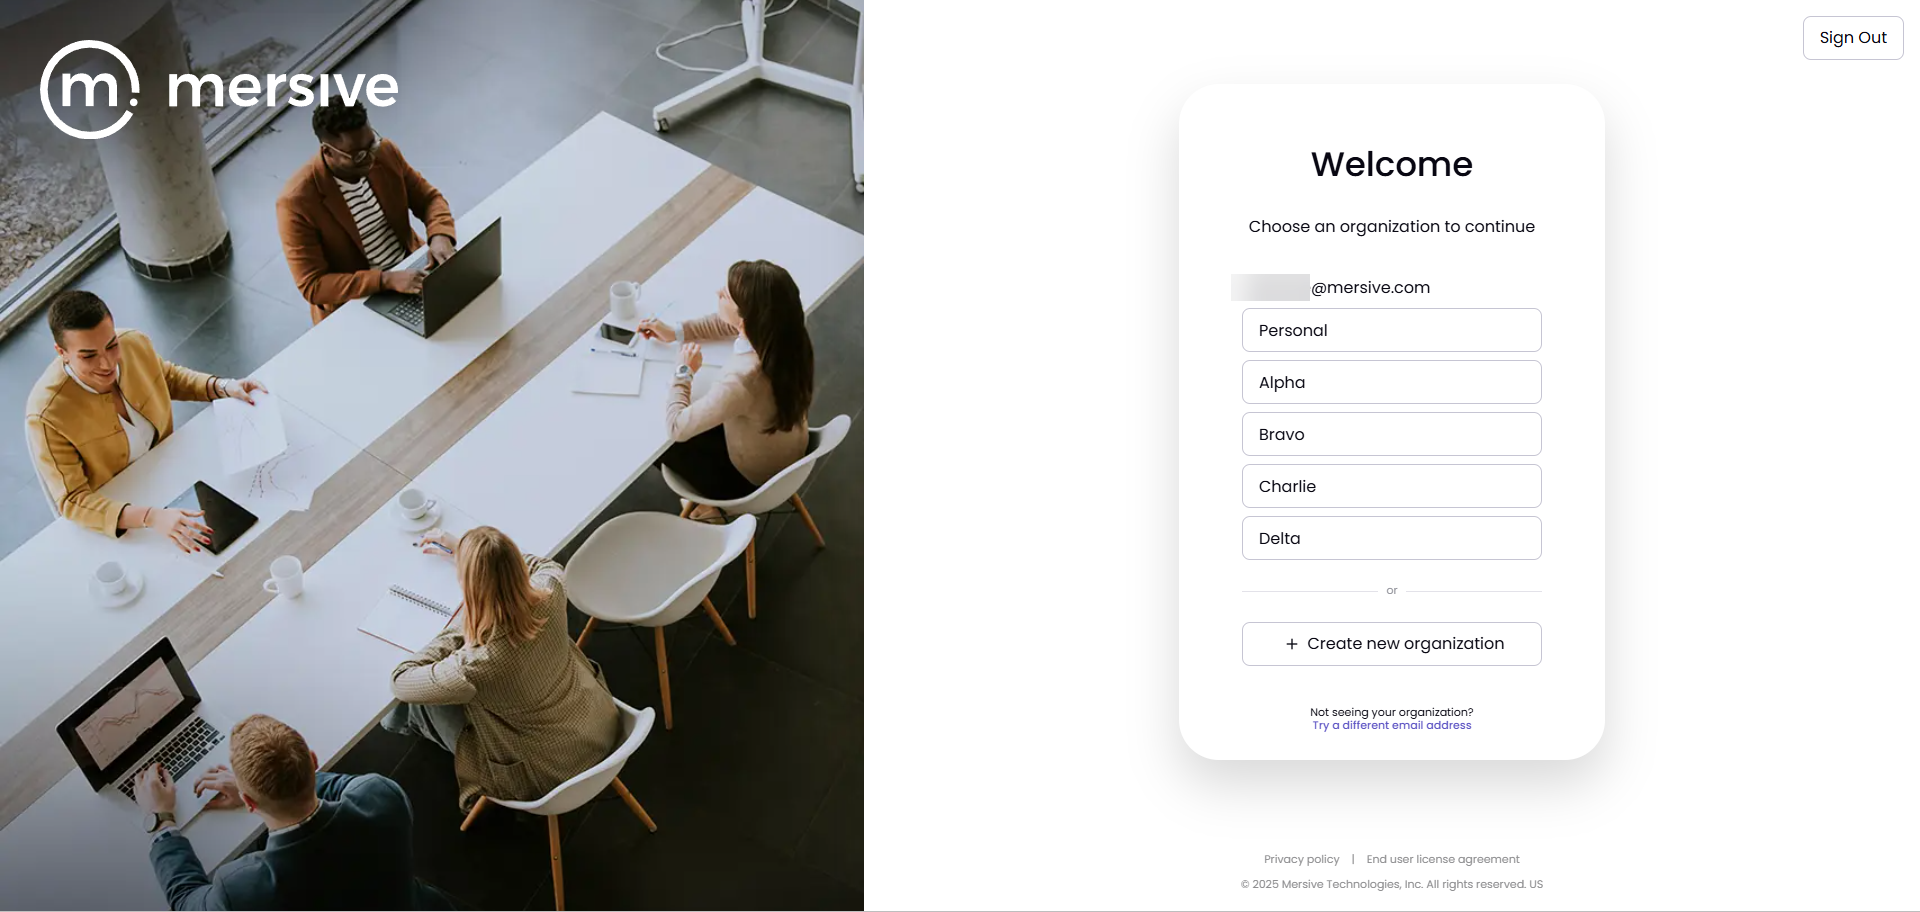
On your laptop, open a web browser and go to app.mersive.com/admin. The Organizations screen appears.
Select Create New Organization. The Create Organization screen appears.
Type a name in the Organization Name field. Note: Names must be 3-50 characters long and cannot include language that is profane or otherwise considered offensive.
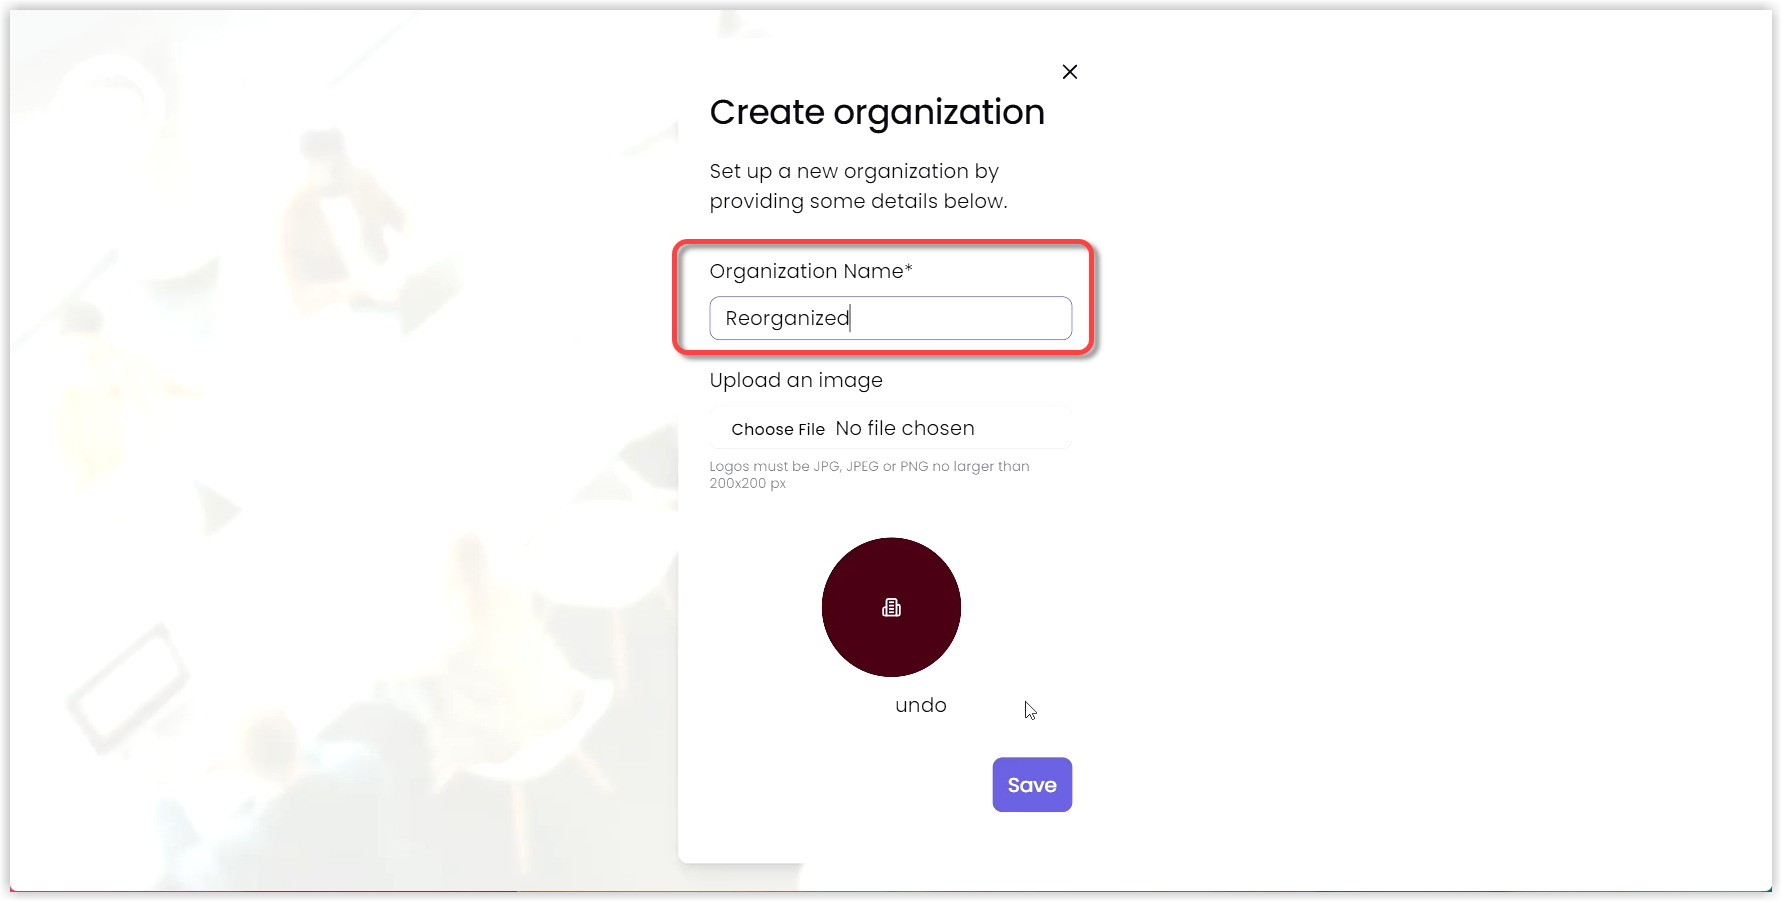
Click Save.
How to Customize Organization Settings
At any time, you can give an organization a new name and add an icon or color to help you quickly tell one organization from another.
To update or customize an organization, take the following steps:
In the admin portal, select the organization you want to customize.
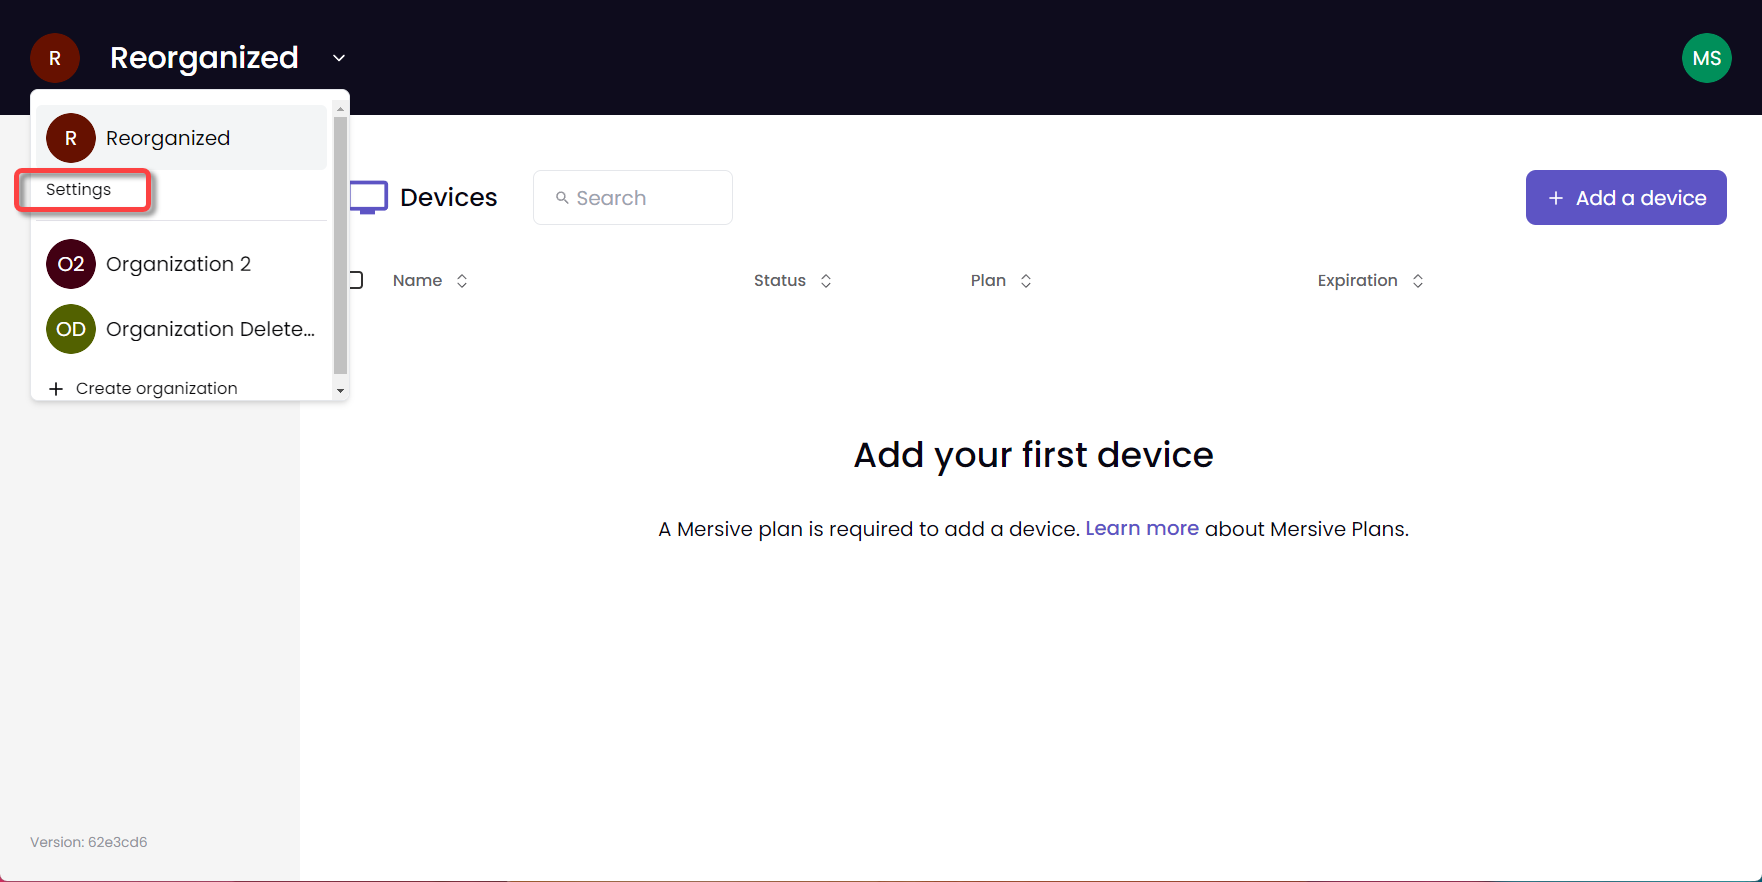
Open the Organizations menu and select Settings. The Organization Settings screen appears.
To change the name, type a new name into the Organization Name field. Note: Names must be 3-50 characters long and cannot include language that is profane or otherwise considered offensive.
To add a logo or image, select Choose File and browse to the image. To remove the image, select Undo. Note: Images can be in JPG, JPEG, and PNG formats and no larger than 200x200 px.
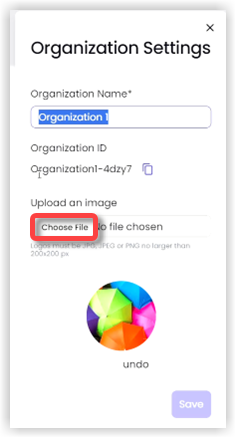
Click Save.
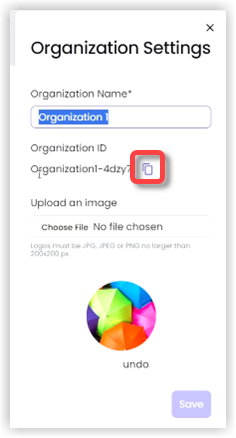
How to Copy the Organization ID
Each organization has a unique number called the Organization ID that is used for internal tracking and to cross-identify an organization in the admin portal.
To copy the Organization ID, take the following steps:
In the admin portal, select the organization.
Open the Organizations menu and select Settings. The Organization Settings screen appears.
Click the Copy icon next to the Organization ID.
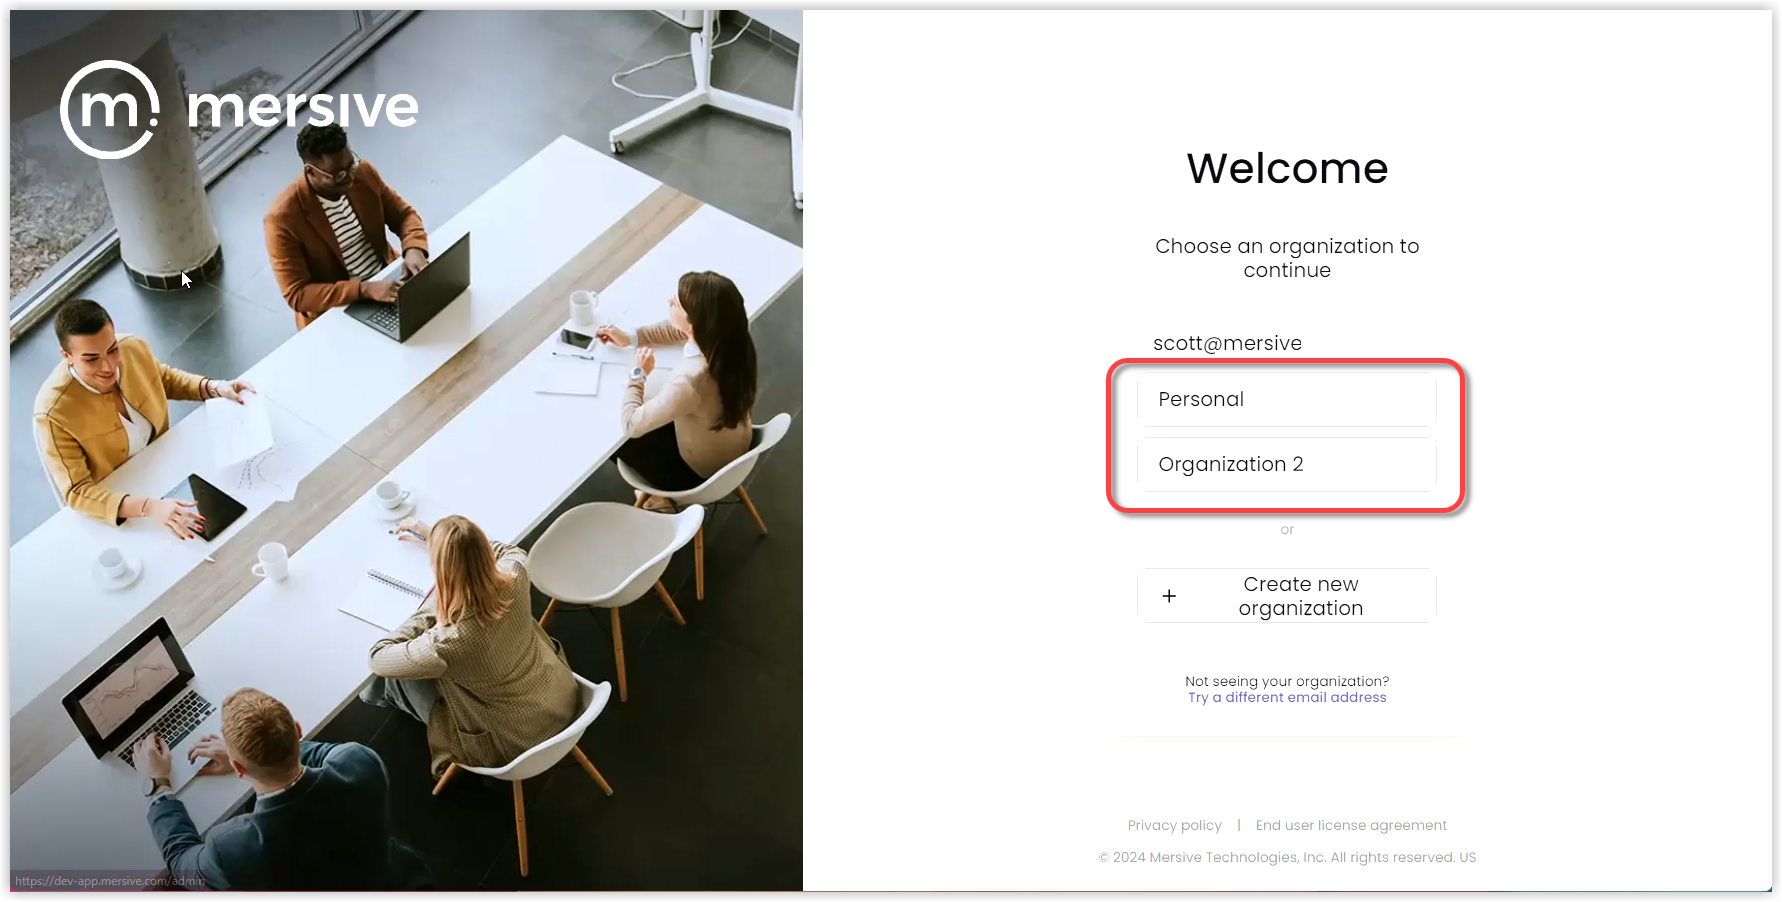
How to Switch Between Organizations
To switch from one organization to another, take the following steps:
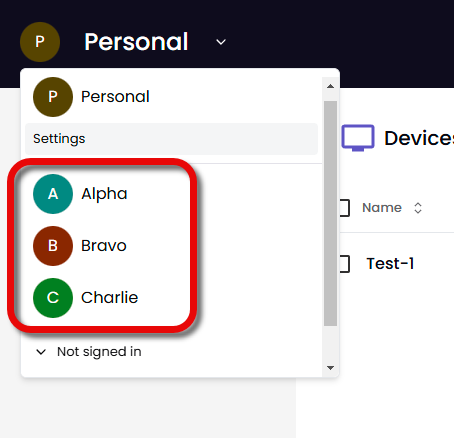
In the admin portal, select the Organization Name in the upper left corner of the screen. A dropdown list appears with all your organizations.
The organizations you've logged into during this session are at the top. If you select one of these organizations, you will switch directly to it.
Select Not signed in to see the list of organizations you have not signed into this session.
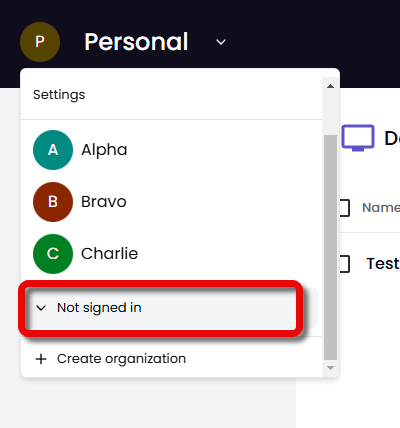
If you select a Not signed in organization, you will switch to the login screen. Note: You will have to sign in again.
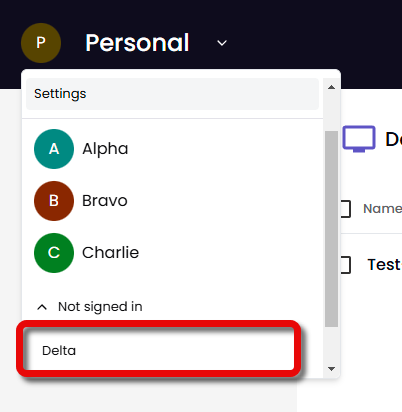
Select the organization from the login screen.