Managing Devices
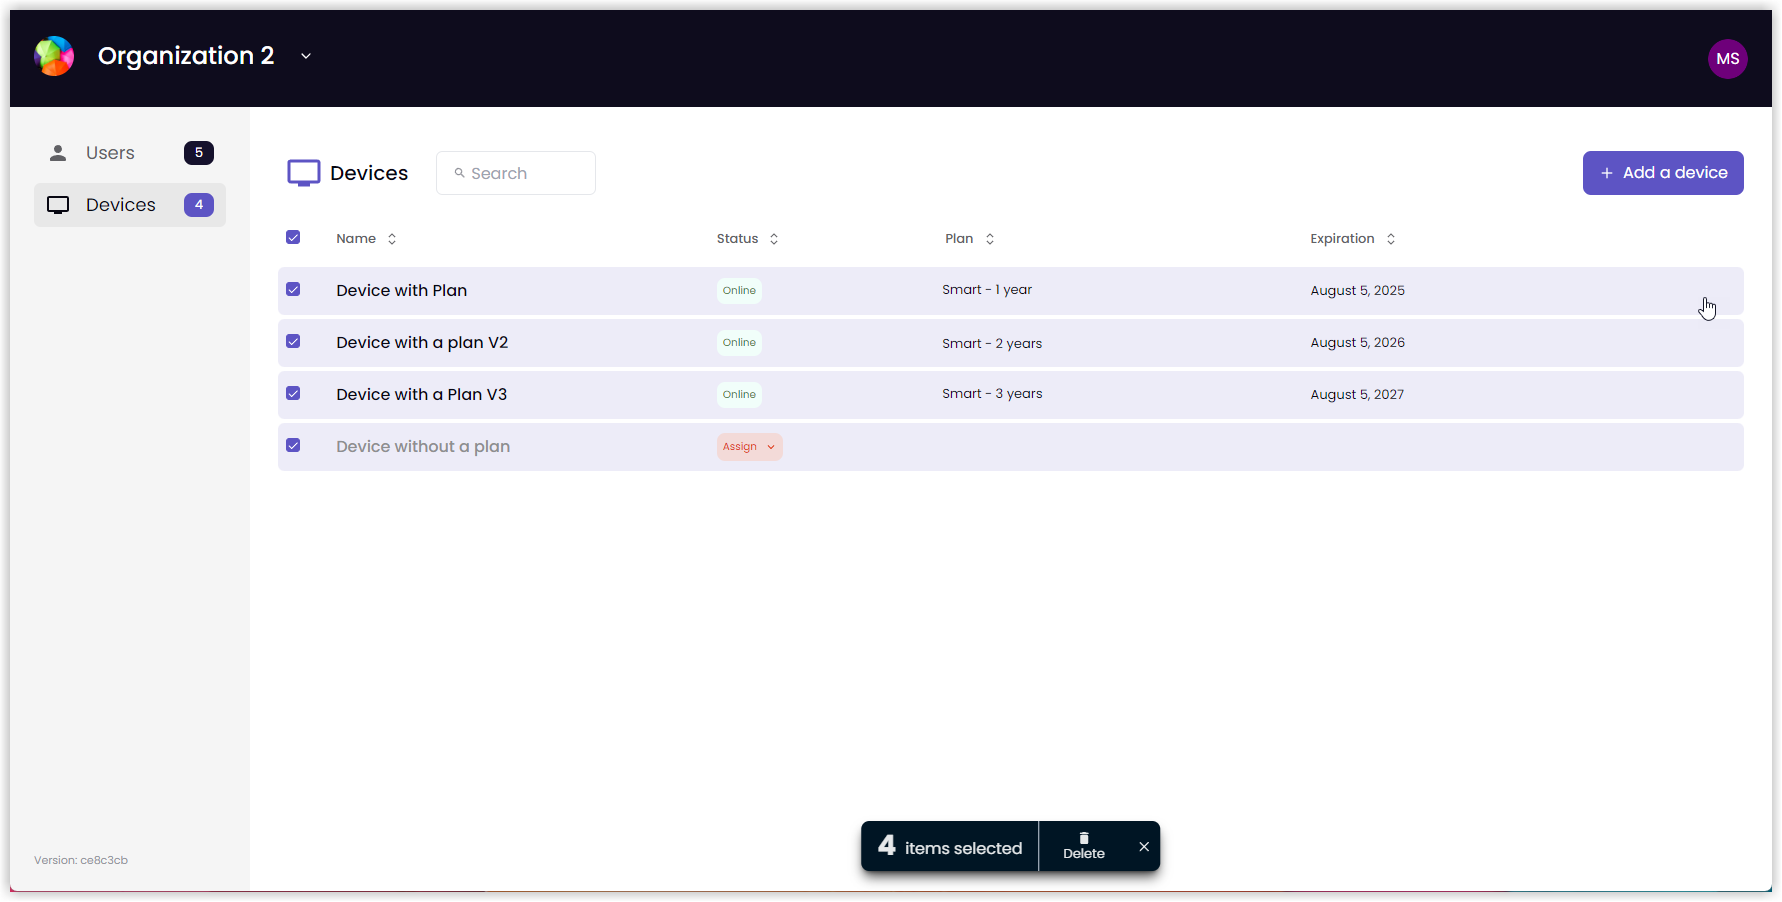
The Devices list allows you to view the list of devices attached to an organization, add or delete devices, check device status, and customize the look-and-feel of your devices. The Devices list displays the devices associated with the organization you logged into. So, if you have multiple organizations, you will need to switch between them to see all the devices attached to your account.
Device status is shown in the Status column. Status messages and their meaning:
Assign: the device does not have a plan assigned to it.
Offline: the device is not responding to the admin portal.
Online: the device is responding to the admin portal.
In Use: one or more users are connected to the display.
Sharing: one or more users are actively sharing to the display.
If you have are having problems managing an offline device, see Troubleshooting Offline Devices more information.
To customize the look and feel of your displays, see Digital Signage and Display Customization.
How to Add a Device to an Organization
This procedure explains how to use the admin portal to add a device. You can also add a device using the Activation procedure, which can be done from a laptop or a mobile device. Adding a device from the admin portal will add it to the organization you’re currently logged into, so be sure to log into the correct organization before starting this procedure.
To add a device to your organization using the admin portal, take the following steps:
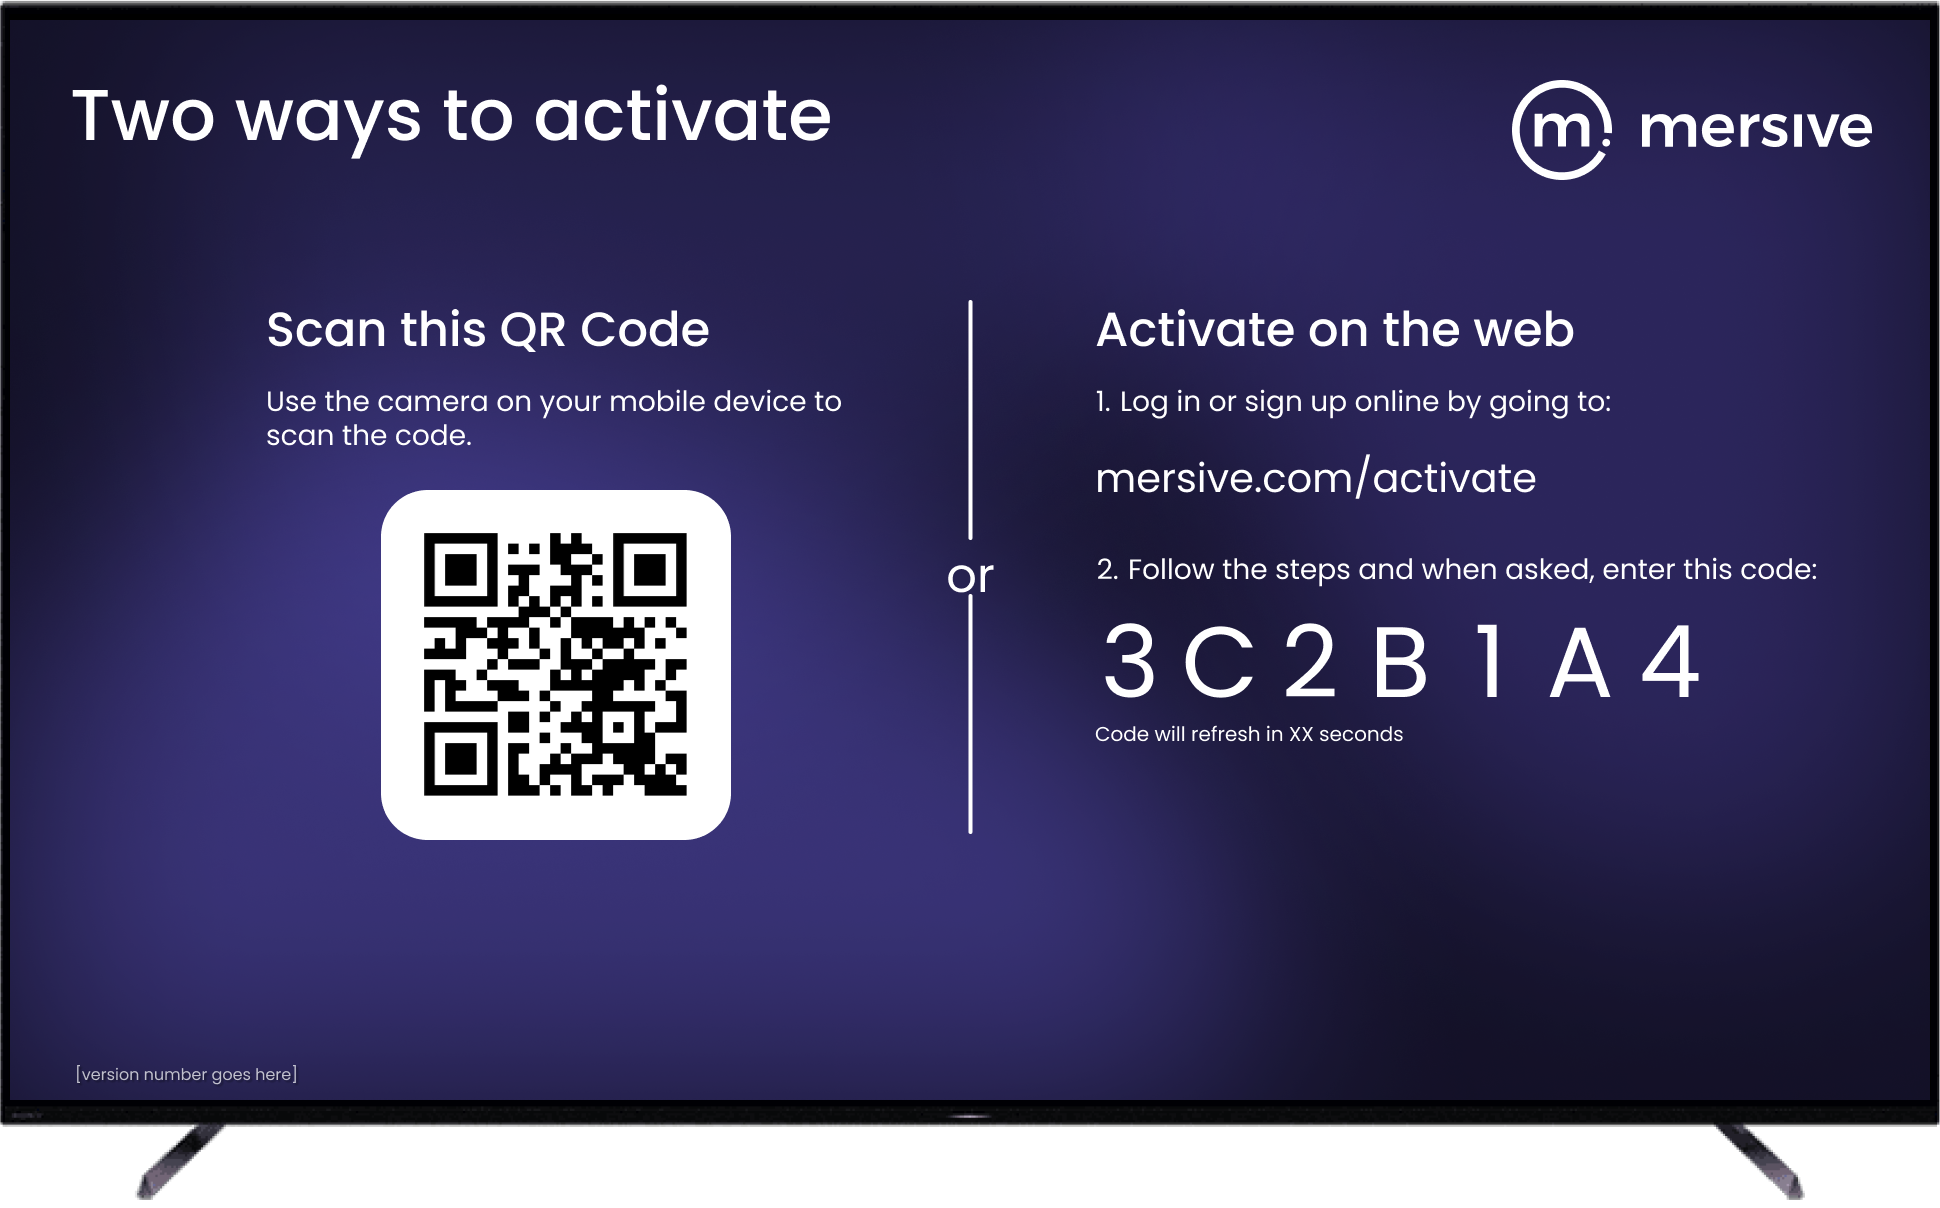
Startup the device being added to your organization and wait until the activation screen displays.
On your laptop, open a web browser and go to app.mersive.com/admin.
Select your Organization. The list of devices attached to this organization appears.
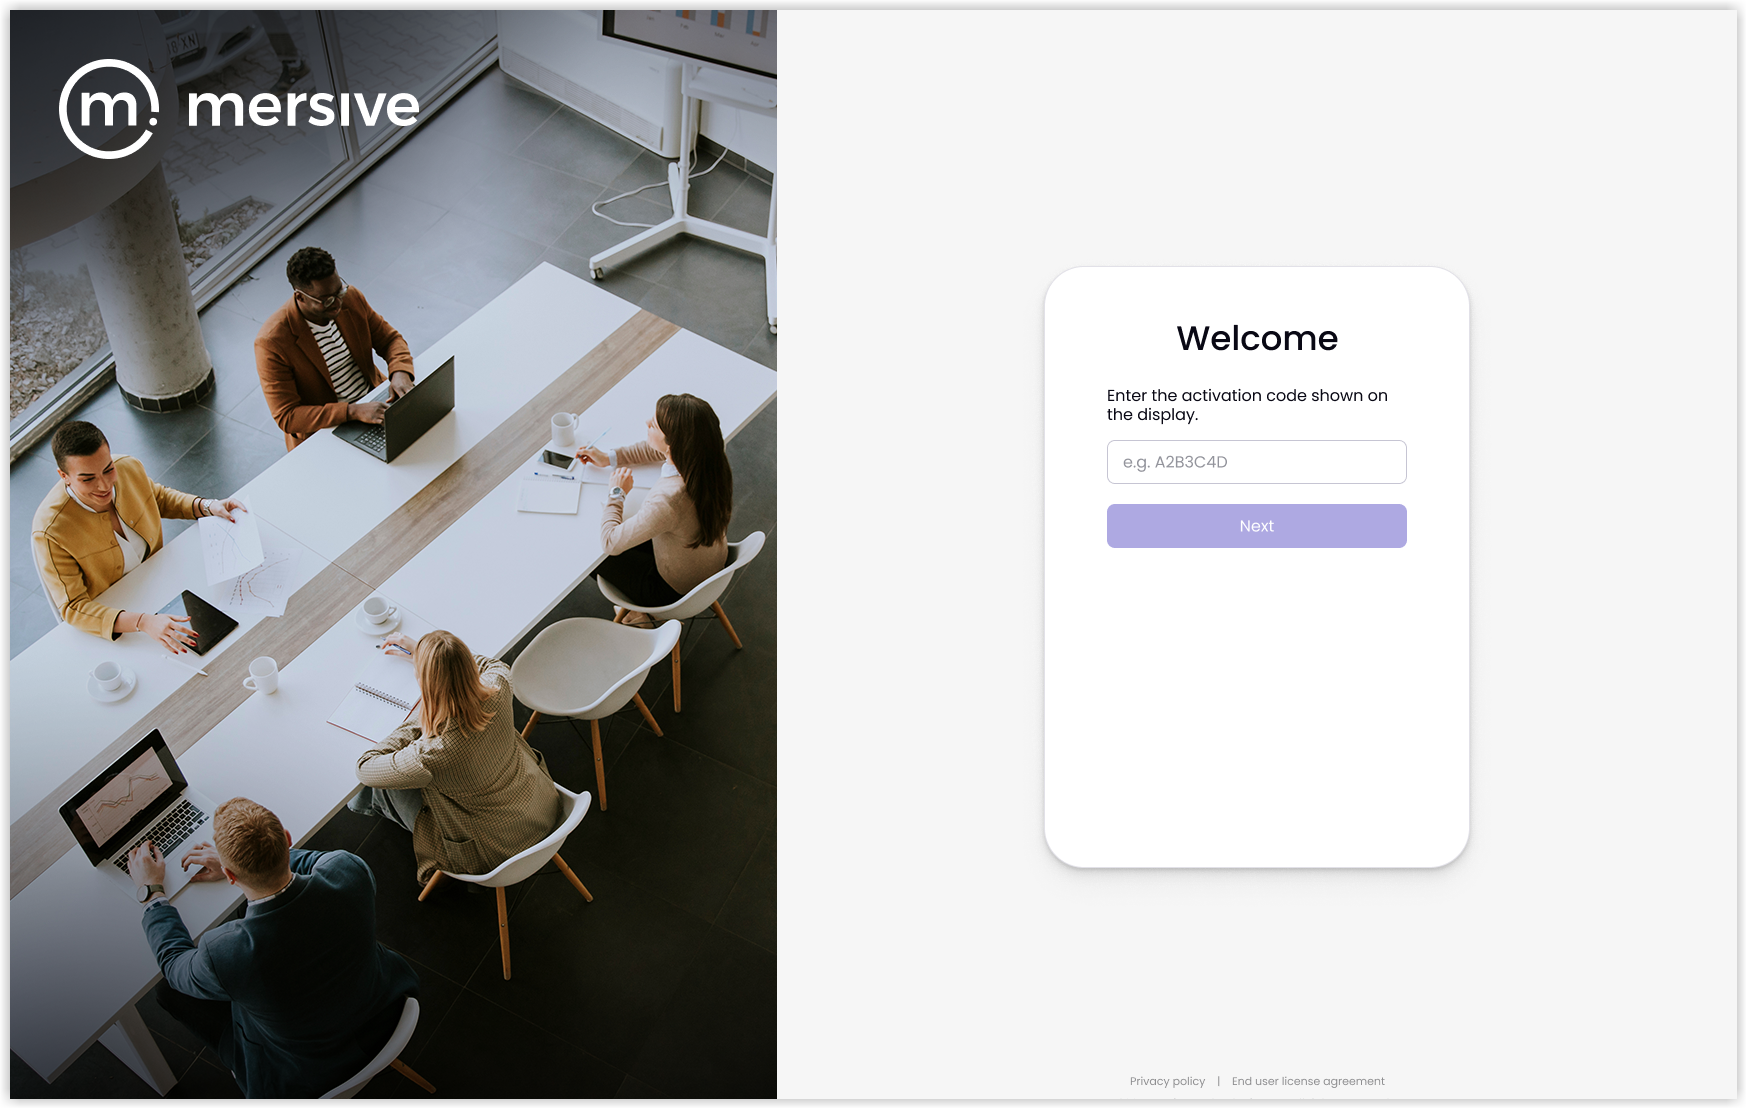
Select Add a device. The Activation screen appears.
Enter the Activation Code from the device. Select Next.
Continue through the activation process.
When the device name appears on the Devices screen in the admin portal, the process is complete.
Deleting Devices
When you remove a device from service, such as when you delete the Smart app from a smart TV or streaming device, the device will still be present in the admin portal. If the device had been activated previously, it will now show an Offline status. So, you will want to delete the device from the admin portal as well. As devices are attached to organizations, you will need to log into the organization that has that device on its list. Device settings and customizations are lost when a device is deleted from an organization in the admin portal.
If you use the admin portal to delete a device that does not have a plan, the device is removed from the list and plans are not affected. But deleting a device with an active plan adds the plan back into the organization’s pool of plans, which means it can be assigned to another device within that organization.
Note
Note: Assigning a plan to another device does not change or reset the plan’s expiration date.
How to Delete a Device from an Organization
To delete a device from an organization, take the following steps:
On your laptop, open a web browser and go to app.mersive.com/admin.
Select your Organization. The list of devices attached to this organization appears.
For multiple devices, select the checkbox next to the device name and then select Delete from the bar at the bottom of the screen. Note: To select all devices, click the topmost checkbox.
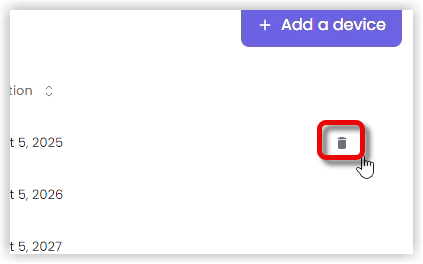
For an individual device, highlight the row of the device and select the Trash Can icon that appears on the right side of the row.
A confirmation screen appears. Select Delete.
The device has been deleted when the name no longer appears on the Devices list.
Template Configuration
How to Configure Templates
Creation
Admins can navigate to the Templates page from the left-hand navigation menu. Click New Template to start configuring settings.
The first step is naming the template - this step is required. The name must be less than 50 characters and must adhere to Mersive’s no profanity policy.
The next steps are under the four tabs in the Appearance section.
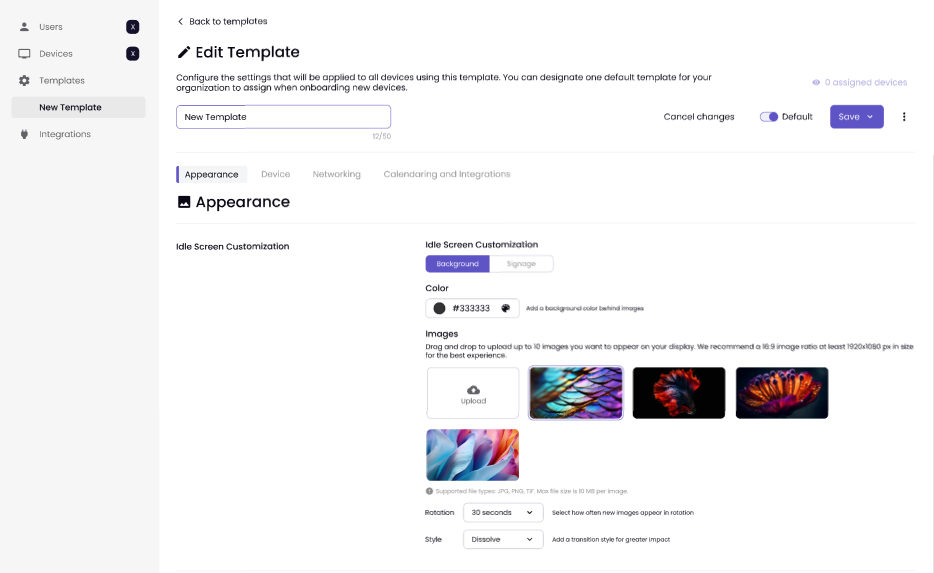
The admin must enable at least one setting to create and save the template. Example: A user can create a template for their idle screen background, but it is not required to configure any networking settings.
Note
During template creation, the save button is disabled until at least one setting is selected, and a template must be saved before it can be assigned to any device.
Management
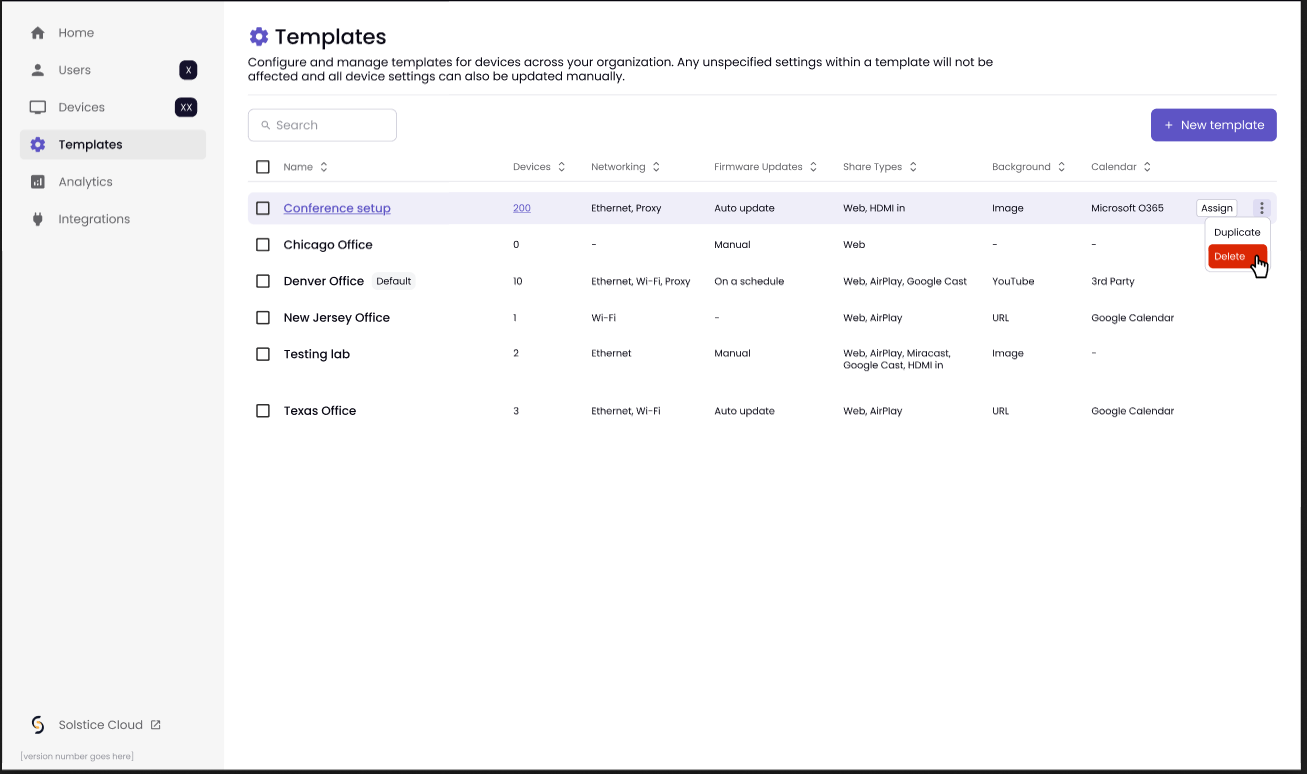
From the Templates page, an Admin or Manager can click the "3-dot" more ellipse icon. This menu gives the user three options:
Edit takes the user to the Edit Template page.
Duplicate copies the template, takes the user to the Edit Template page, and adds a “1” to the existing name. Look for this feature in an upcoming release.
Delete shows the user a confirmation modal that they must confirm before deleting the template.
Deletion
To delete a template, go to the Template page and hover over the "3-dot" more ellipse icon in the far right column. The user will confirm the deletion on the confirmation page and then receive a green success message.
A template can also be deleted from the Edit Template page using the 3-dot menu next to the Save button.
Template Assignment and Unassignment
Assignment
There are five ways to assign a template:
When onboarding a single device: The user can choose an existing template to assign after naming their device but before assigning a plan.
This is not a required step in the onboarding process.
A Skip for Now button is enabled for the user, meaning the device will onboard using Mersive’s default settings.
When onboarding in bulk: The user can add a Template column to their bulk onboarding CSV containing a template they wish to assign to a device or devices.
This is not required as part of bulk onboarding.
If a field is left blank, the system should warn the user that no information was input into the CSV.
This should not prevent onboarding the devices with Mersive’s default settings.
After saving a template: The user can click Save and Assign and then select which devices to assign the template.
The system shows the user a confirmation modal asking whether they’re sure they want to proceed with the assignment, along with the implications of proceeding.
If any unique settings exist, the user is presented with a form to upload a CSV with the selected device’s credentials.
From the templates page: The user can hover over any template, click Assign, and then select devices.
The system shows the user a confirmation modal asking whether they’re sure they want to proceed with the assignment, along with the implications of proceeding.
If any unique settings exist, the user is presented with a form to upload a CSV with the selected device’s credentials.
From the devices page: The user can click on the Templates column and select which one to assign to the device.
The system shows the user a confirmation modal asking whether they’re sure they want to proceed with the assignment, along with the implications of proceeding.
If any unique settings exist, the user is presented with a form to input the single device’s credentials.
Unassignment
Templates can be unassigned via the Devices page one at a time or in bulk:
Unassigning a single device:
Click on the name of the template in the device’s row.
Click Unassign in the menu of existing templates.
Confirm the unassignment. No device settings are changed; the device is simply no longer mapped to the template.
Unassigning devices in bulk
Select multiple devices.
Click on the Templates option on the bulk action bar.
Click Unassign in the menu of existing templates.
Confirm the unassignment. No device settings are changed; the device is simply no longer mapped to the template.
Bulk Device Edit
The Bulk Edit feature provides a “find and replace” mechanism to replace existing settings or populate blank fields with new configurations.
Bulk Edit of Device Settings
Once devices are grouped by tags, administrators can select all devices in the group and apply Bulk Edit to change settings. Available settings include network configuration, idle screen image or digital signage URL, time format, room calendar settings, and security settings (e.g., uploading new SSL certificates).
Note
Bulk editing of Network Settings may need to be separate from other settings due to propagation time, fallback functionality, etc.
One-Time Apply Template Option
The Bulk Edit feature is designed to use a one-time apply template model, allowing administrators to apply settings without creating permanent dependencies. This approach eliminates the need for multiple templates and automatic cascading changes, simplifying permission management for users who need editing rights.
This approach also simplifies permission management, as users will not need access to multiple templates to make device-specific edits. By avoiding permanent template assignments, we can streamline permissions, allowing users to make changes to devices as needed without conflicts arising from template dependencies.
Enhanced Device List with Setting Columns
The Device List page should include columns for most device settings, enabling administrators to view, filter, and edit devices by specific configurations directly in the list view. Admins can see which devices require updates, apply Bulk Edit as needed, and maintain an overview of device status across the fleet.