Conferencing Space Setup
Now that you have configured your Solstice Pods for use with Solstice video conferencing, you can move on to setting up the Pod in its intended conferencing space. Solstice is designed to be used in both small meeting spaces, such as huddle rooms, and larger more complex conference rooms. See below for physical setup tips, as well as how to set up a standard Solstice room for video conferencing.
Physical Setup Tips
Because Solstice Pods do not store user credential information, unencrypted passwords, or users’ data that is shared to the display, the Pods devices do not need to be located in secure locations. However, other considerations related to theft and environmental conditions should be considered.
Solstice supports plug-and-plug USB devices. Devices, such as room cameras, should be connected to the Solstice Pod via USB and must be in-room. See Supported Video Conferencing Peripherals for more about device support. Note that DSPs and other processing hubs may not be compatible and should be avoided unless it is specifically supported.
Display monitors must be directly connected to the Solstice Pod via HDMI video cables to the HDMI ports on the back of the Pod.
Physical Setup Requirements
View the full Gen3 Solstice Pod Specs.
Gen3 Solstice Pod running latest software version
Mersive power supply (strongly recommended if USB-powered peripherals are attached)
Ethernet cable (PoE+ supported if USB devices powered directly or with powered USB hub)
1 HDMI cable for each display monitor
USB conference camera (recommended, with own power supply)
USB microphone or speakerphone (recommended, with own power supply)
Audio speakers (optional, 3.5 mm stereo plug supported)
Sample Setup Diagram
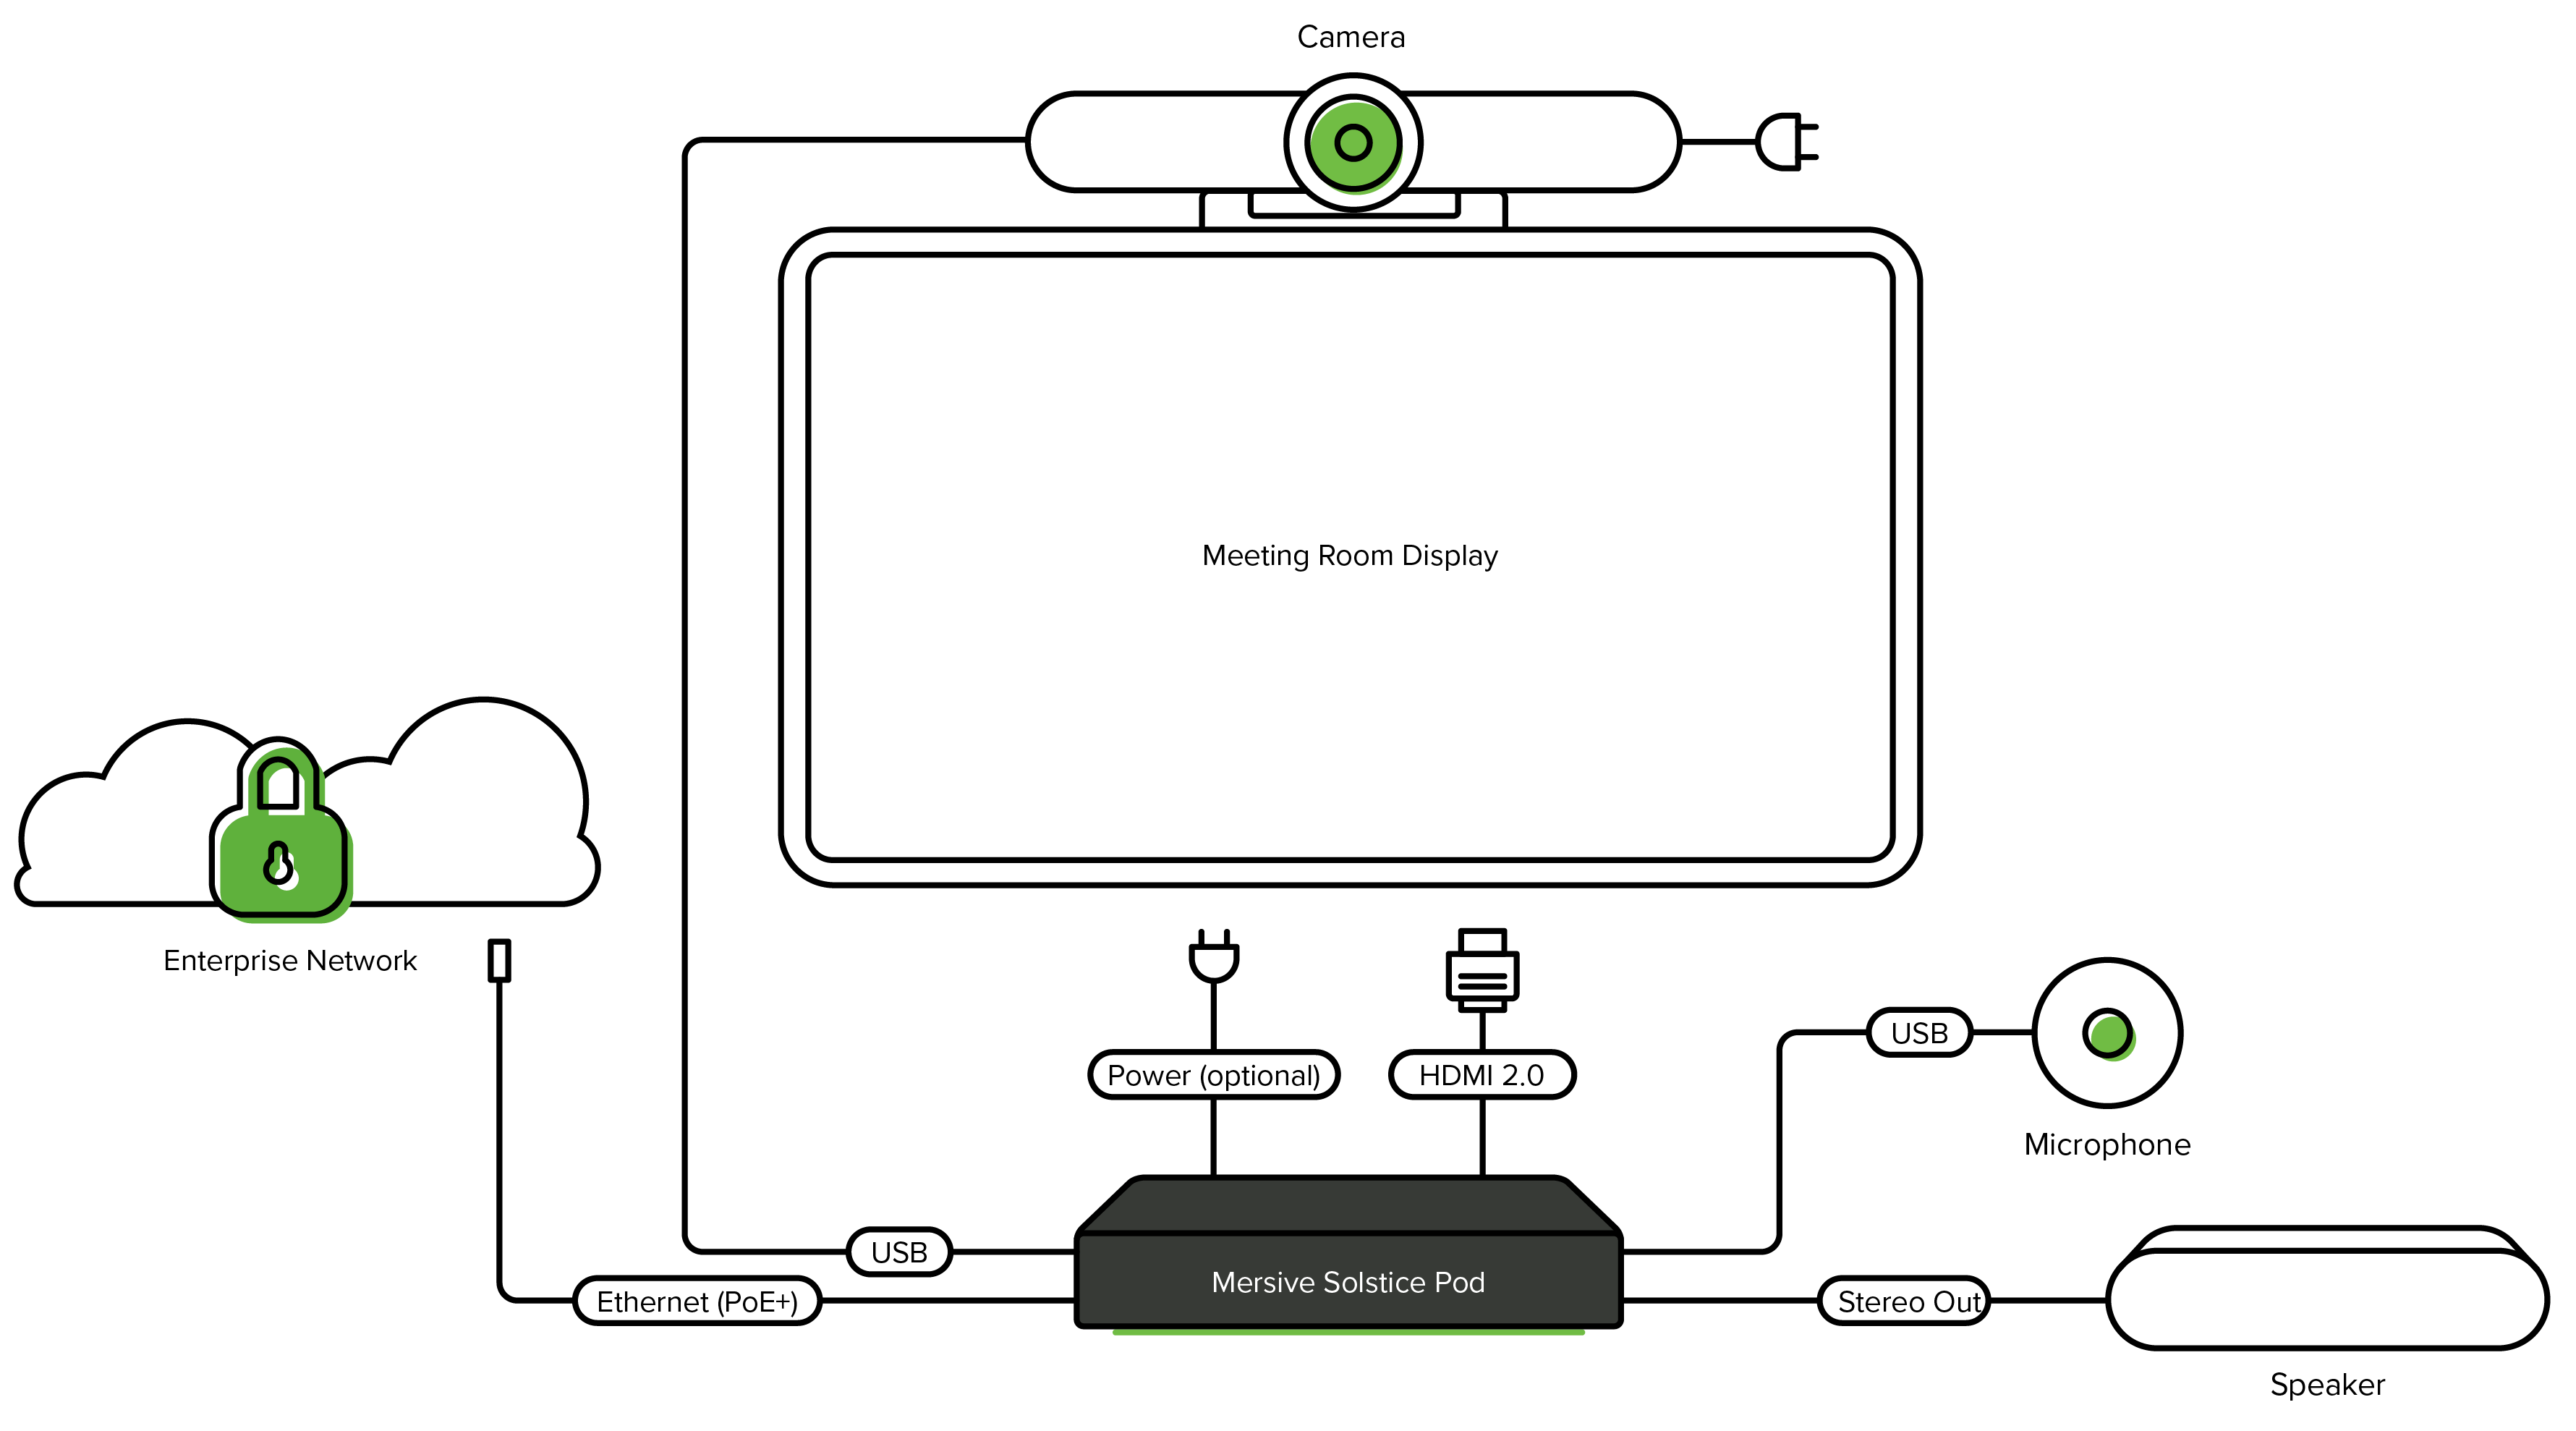
Physical Solstice Pod Setup for Solstice Video Conferencing
Follow the steps below for an example of how to physically set up a Solstice Pod to enable wireless video conferencing with Solstice in a standard room configuration. For assistance with more complex room setups, contact your AV/IT integrator or Mersive Support.
Plug the Solstice Pod into your network via Ethernet (PoE+ supported if USB devices have their own power supplies).
If your Ethernet connection does not support PoE+ or there are USB peripherals plugged into the Pod, use the Mersive-provided power supply. Mersive strongly recommends a powered USB hub if using multiple USB-powered peripherals.
Connect the display monitor to the one of the HDMI ports on the back of the Pod using an HDMI cable. Up to two display monitors can be connected to the Pod via HDMI.
Connect your USB conference camera to one of the USB ports on the back of the Pod.
Connect your USB microphone or speakerphone to another USB port on the back of the Pod.
Connect any audio speakers to the Pod via the stereo out port.